
I attended my first Renaissance faire in over twenty years this Fall after discovering that the Northern California Ren Faire in Hollister was just a few miles from where my son lives. I put together a costume consisting of a leather jerkin, leather hat, leather bags, and slops made of upholstery fabric.
For shoes I wore a pair of old water shoes. I considered making something better, but didn’t really have the time, and dreaded the daunting task of making footwear that I could wear all day.
The jerkin especially, and the hat, were a lot of fun to make. The smaller bag on my left hip has a molded leather face on the flap which I find amusing.
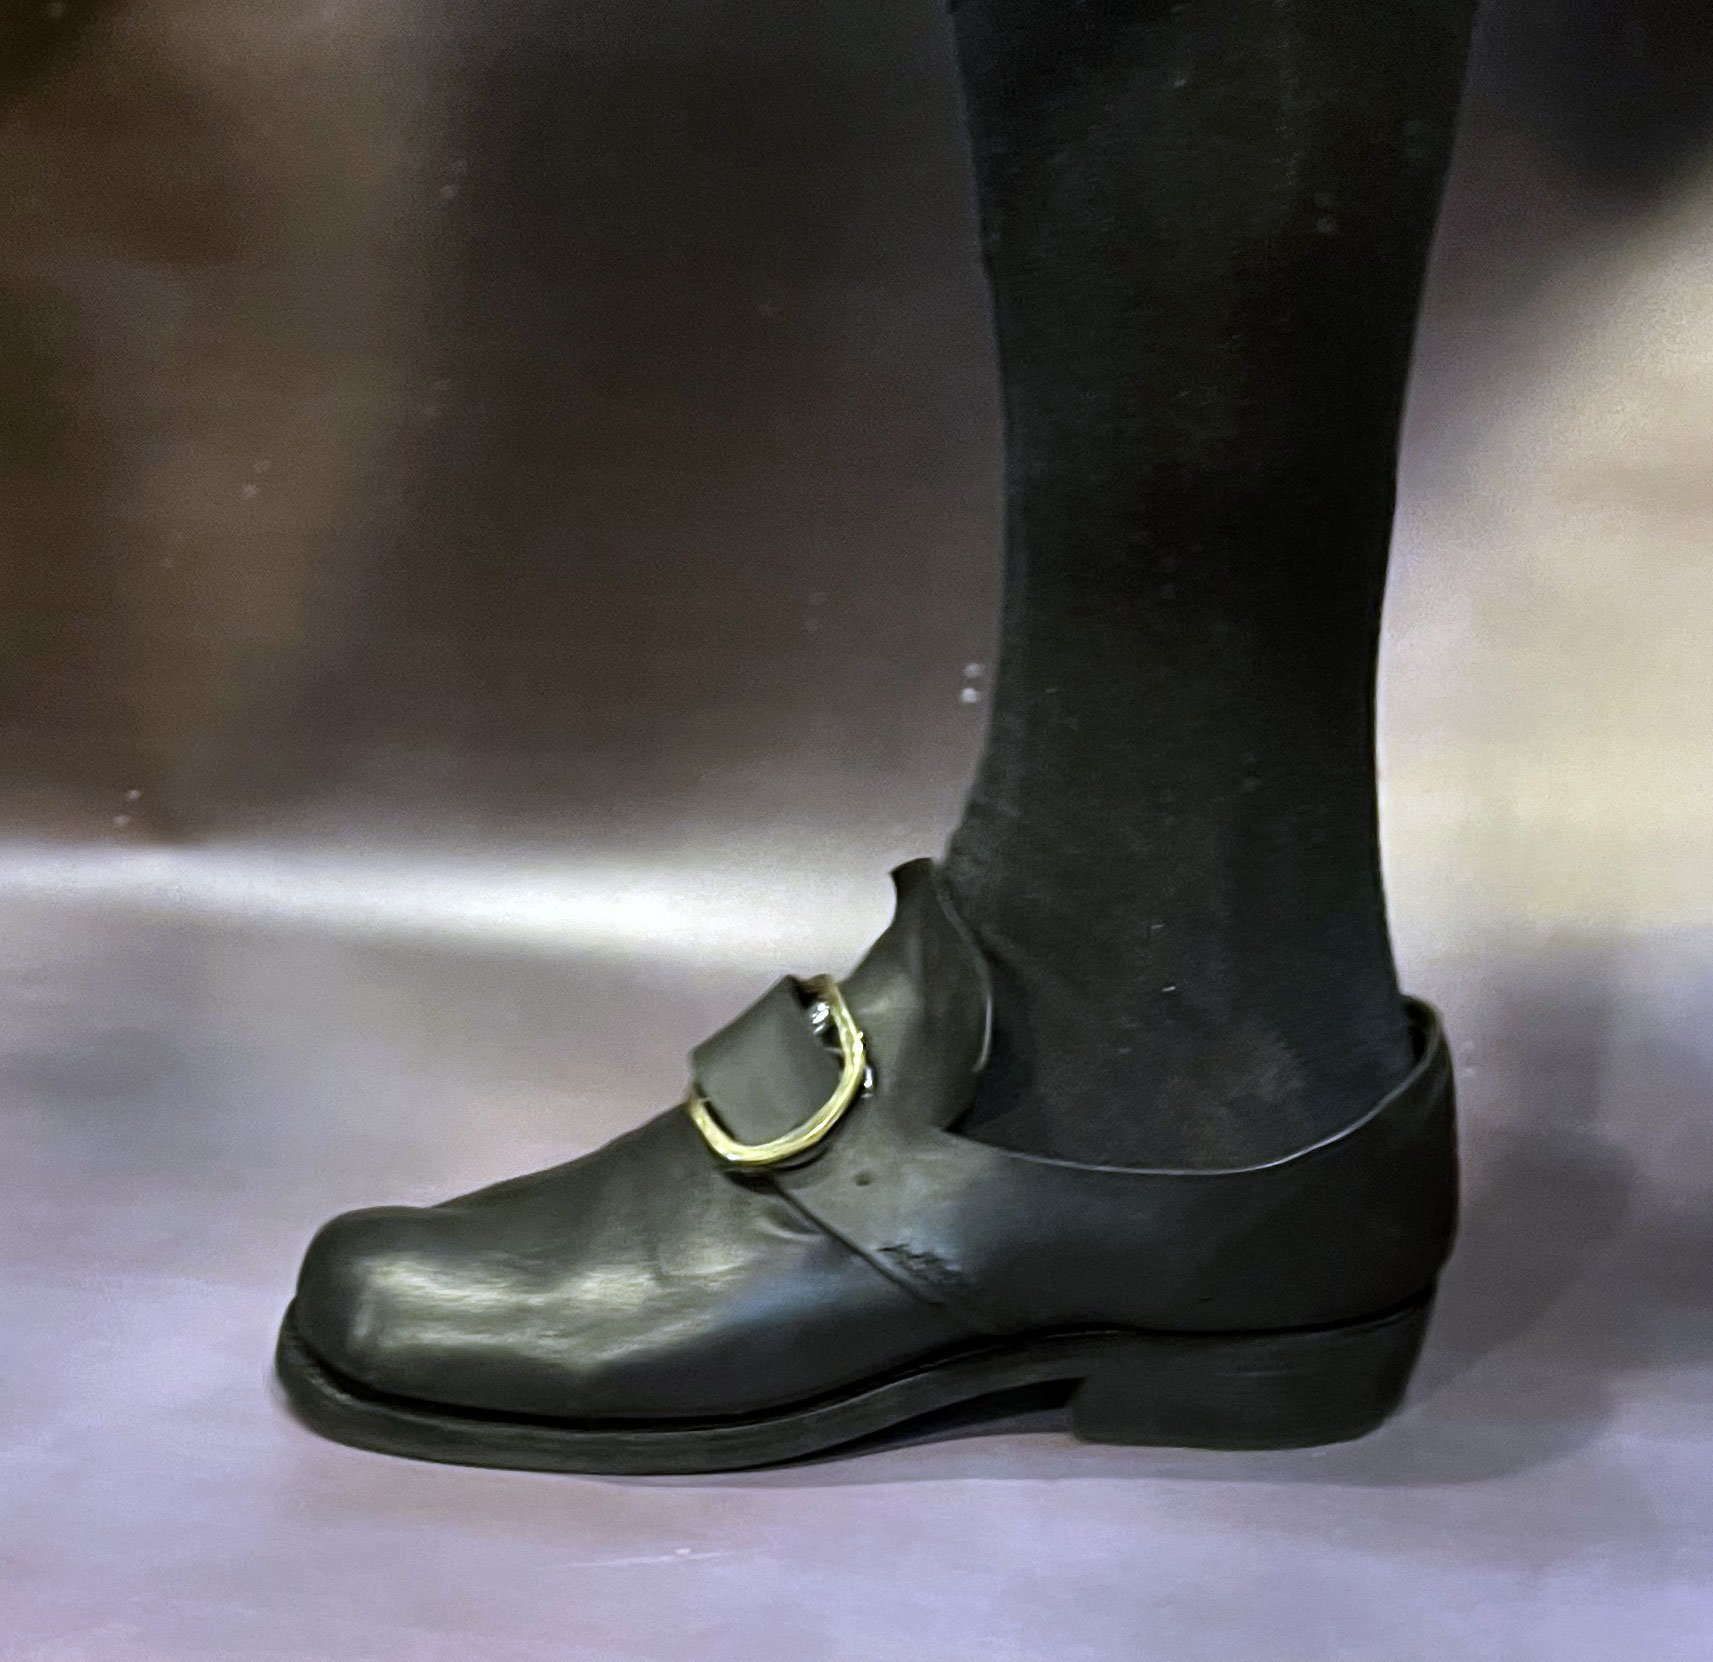
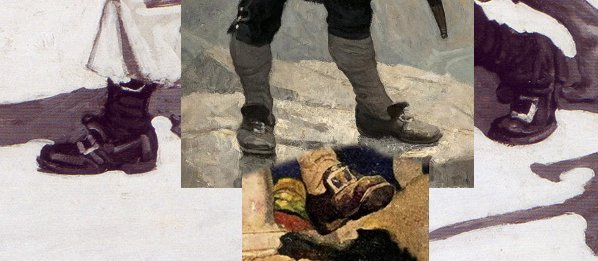
After the faire I decided I wanted to make a pirate costume, especially the cocked tricorn hat and the shoes. I looked to prominent 20th century illustrators to study 17th century footwear: N.C. Wyeth, Howard Pyle, and my favorite Frank Schoonover. I was aiming for a low, square-toed shoe with a large, single brass buckle on the top. A common construction worn by pirates and pilgrims alike, along with many others.
I knew that to do this properly I would need a wooden last over which the shoe would be constructed. Finding one with the square toe proved challenging, but on Etsy I discovered a listing for a pair of antique wooden lasts described as a “pilgrim shoe former”. The size was marked 5E ( I wear a 9½ US, 43 European), but the measurements given seemed quite close to my foot size. So I bought them, figuring I could alter them as needed. Note that they come in two parts, which allows them to be removed from the finished shoe.
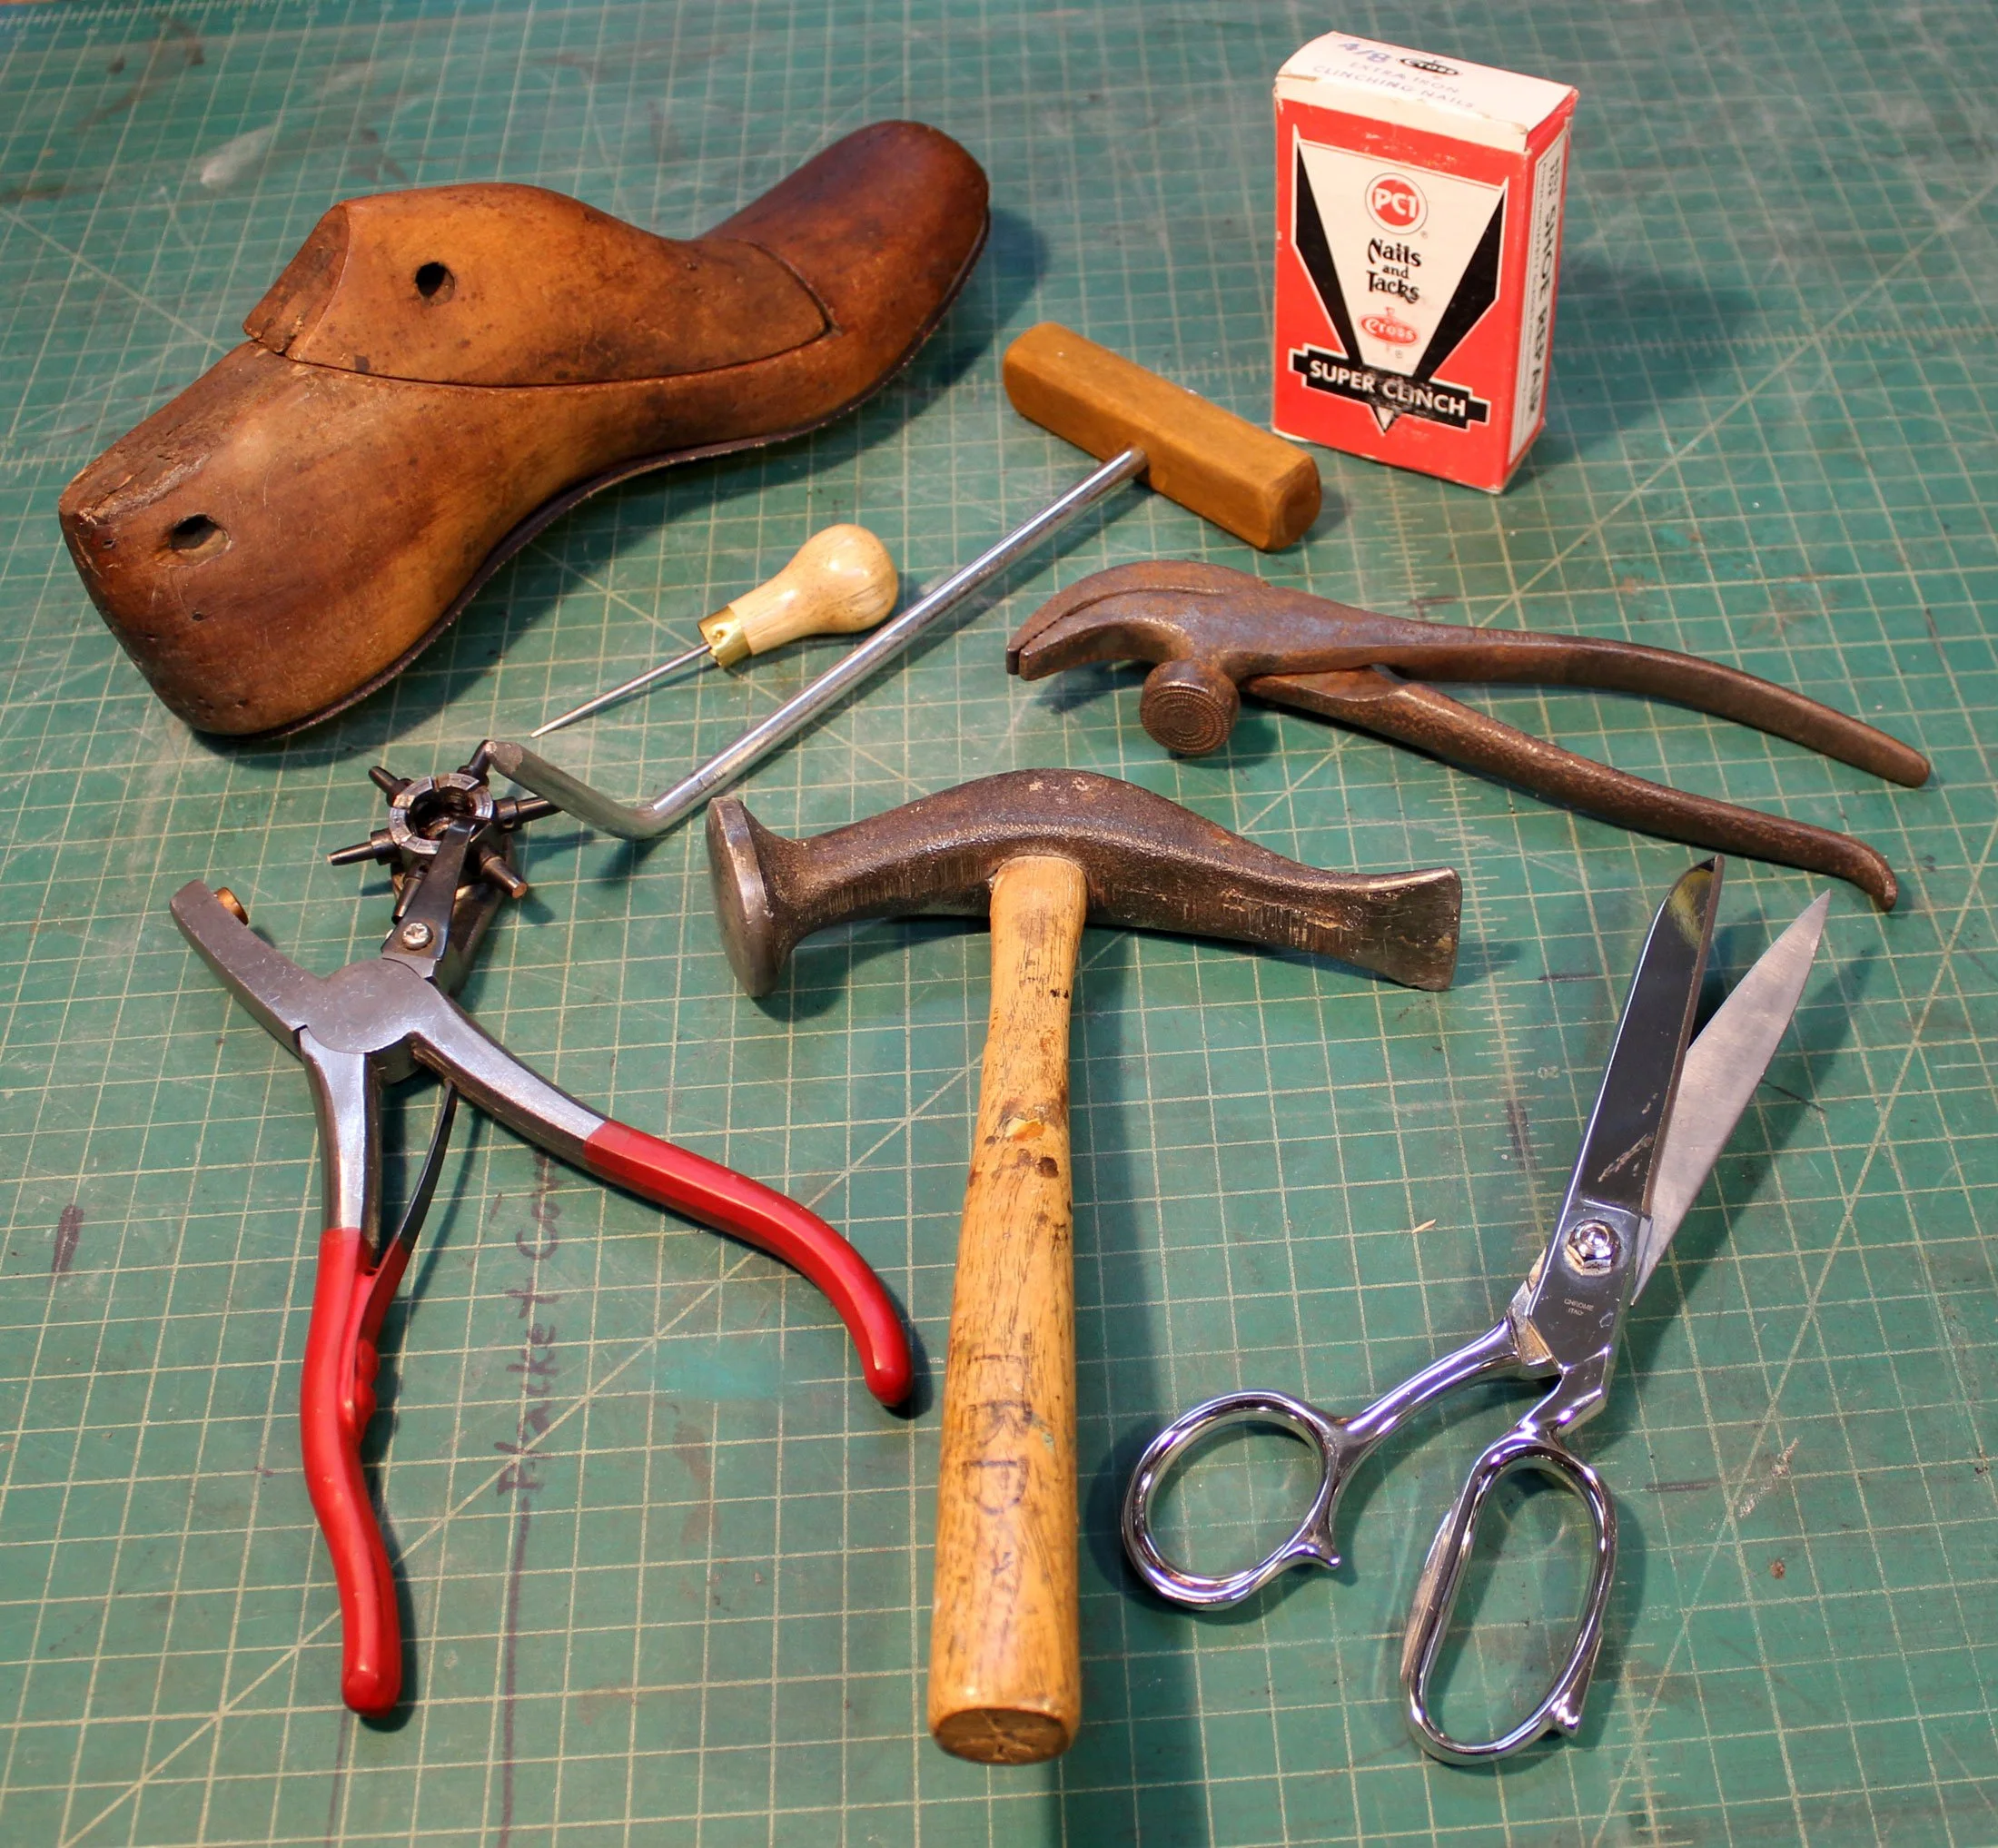
Lasting Pliers at upper Right in front of box of Nails. Last Extraction Tool to its left at Upper Center.
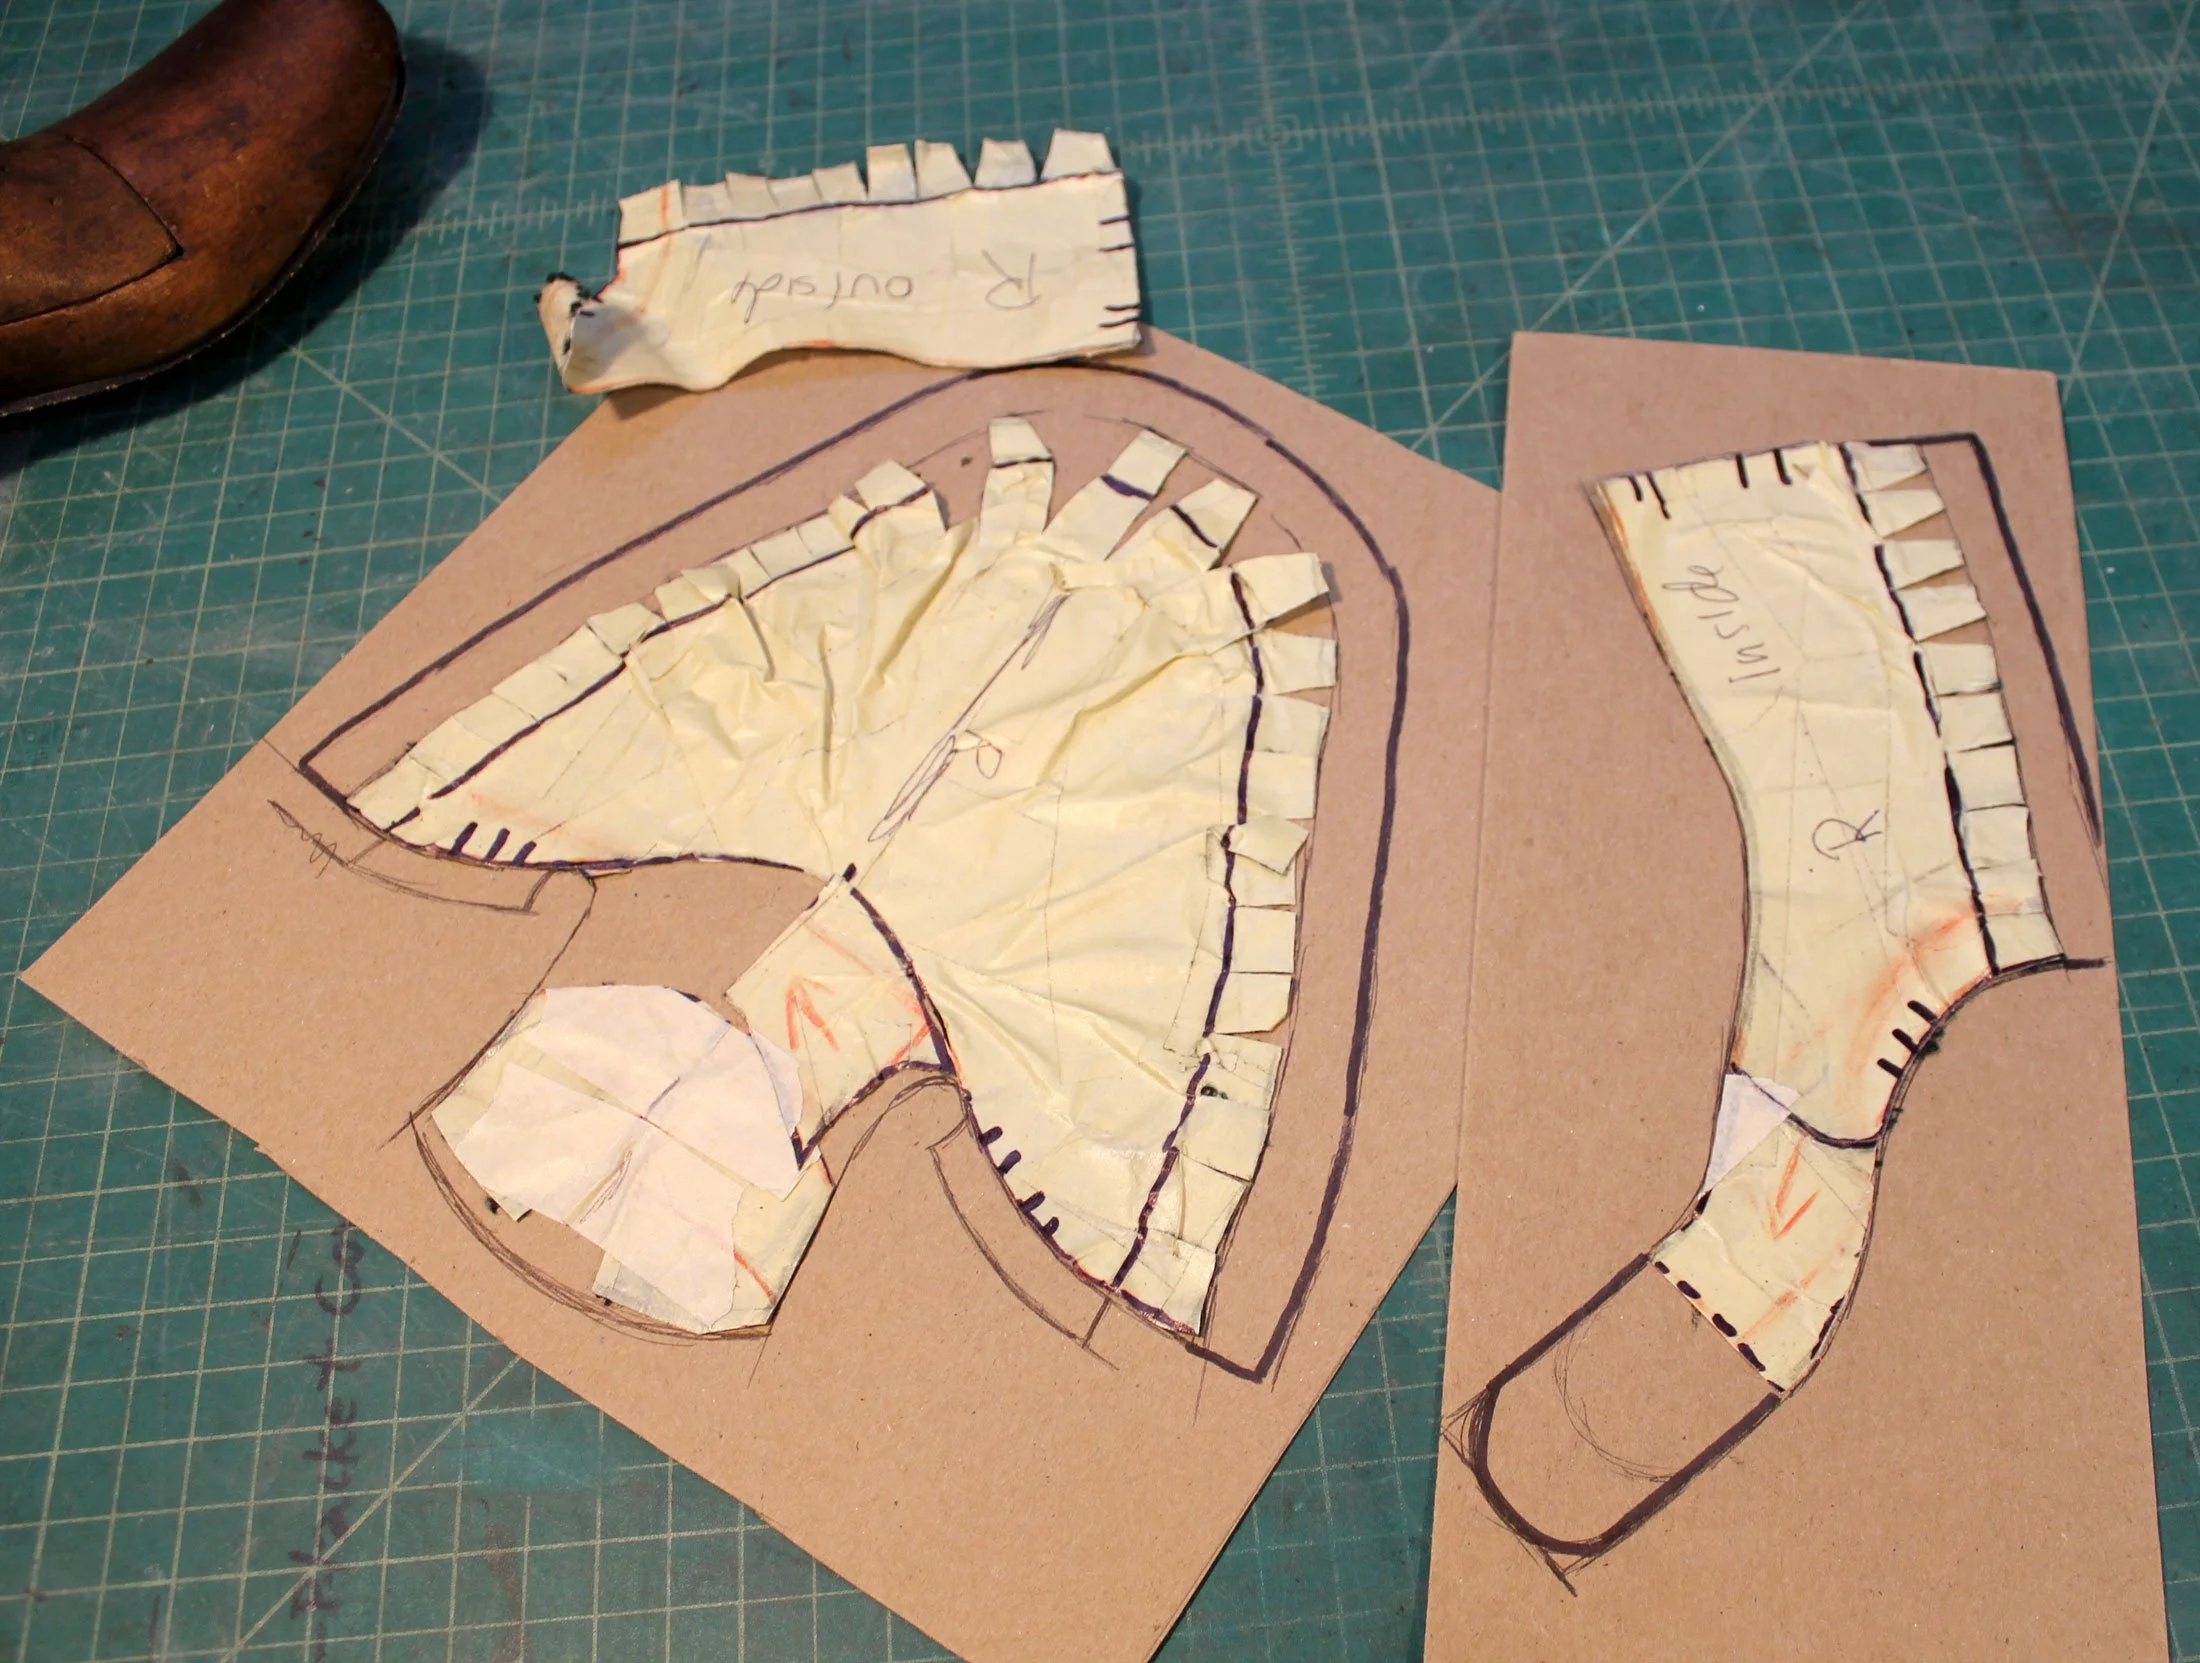
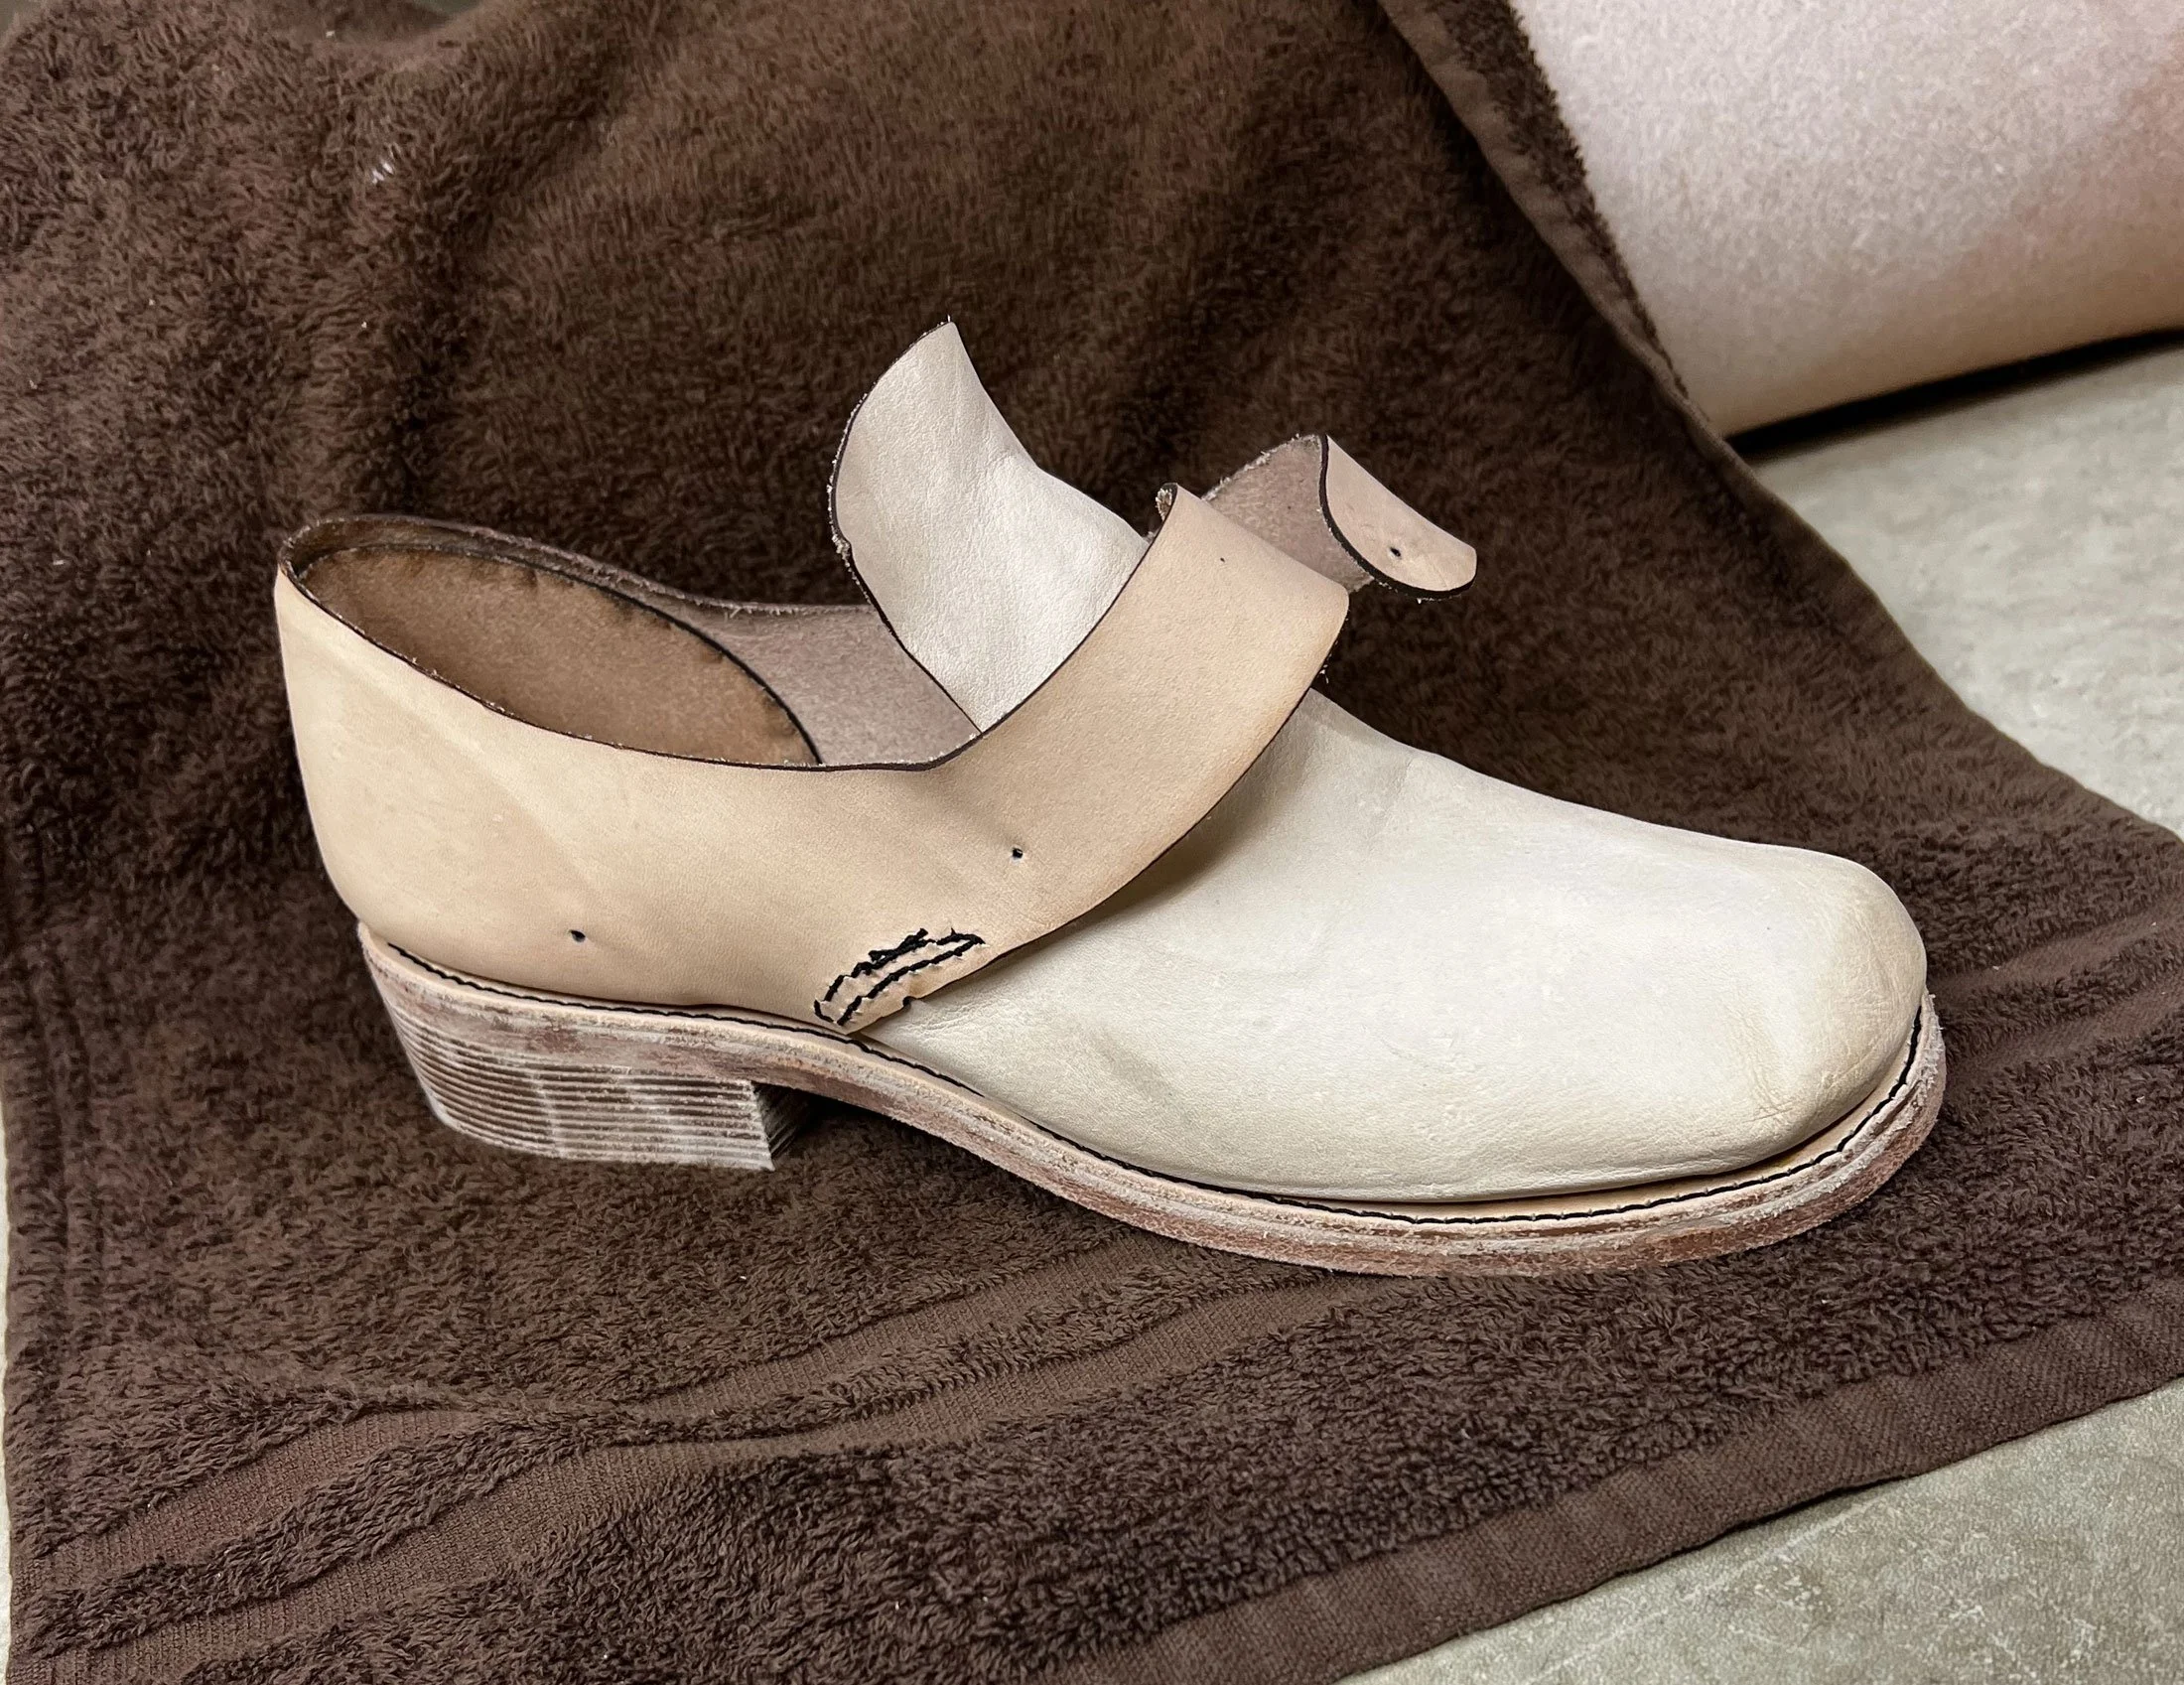
I began by covering the right wooden last in masking tape. Then I used a felt marker to delineate the two main pattern pieces: The vamp, which covers the toes, and the quarters, which covers the heel. I used an Xacto blade to cut the pattern pieces out and stuck the tape down onto chipboard. I added on a seam allowance, the straps, the tongue, and the extra leather needed to wrap around the toes and heel to get my finished patterns.
As I was concerned about the ability of the leather uppers to wrap around the toes, I chose a thin 2-3 oz. milled veg tan leather for the vamp. For the quarters I went with a sturdier 4 oz veg tan. First I made a heel support called a counter and shaped it damp around the heel.
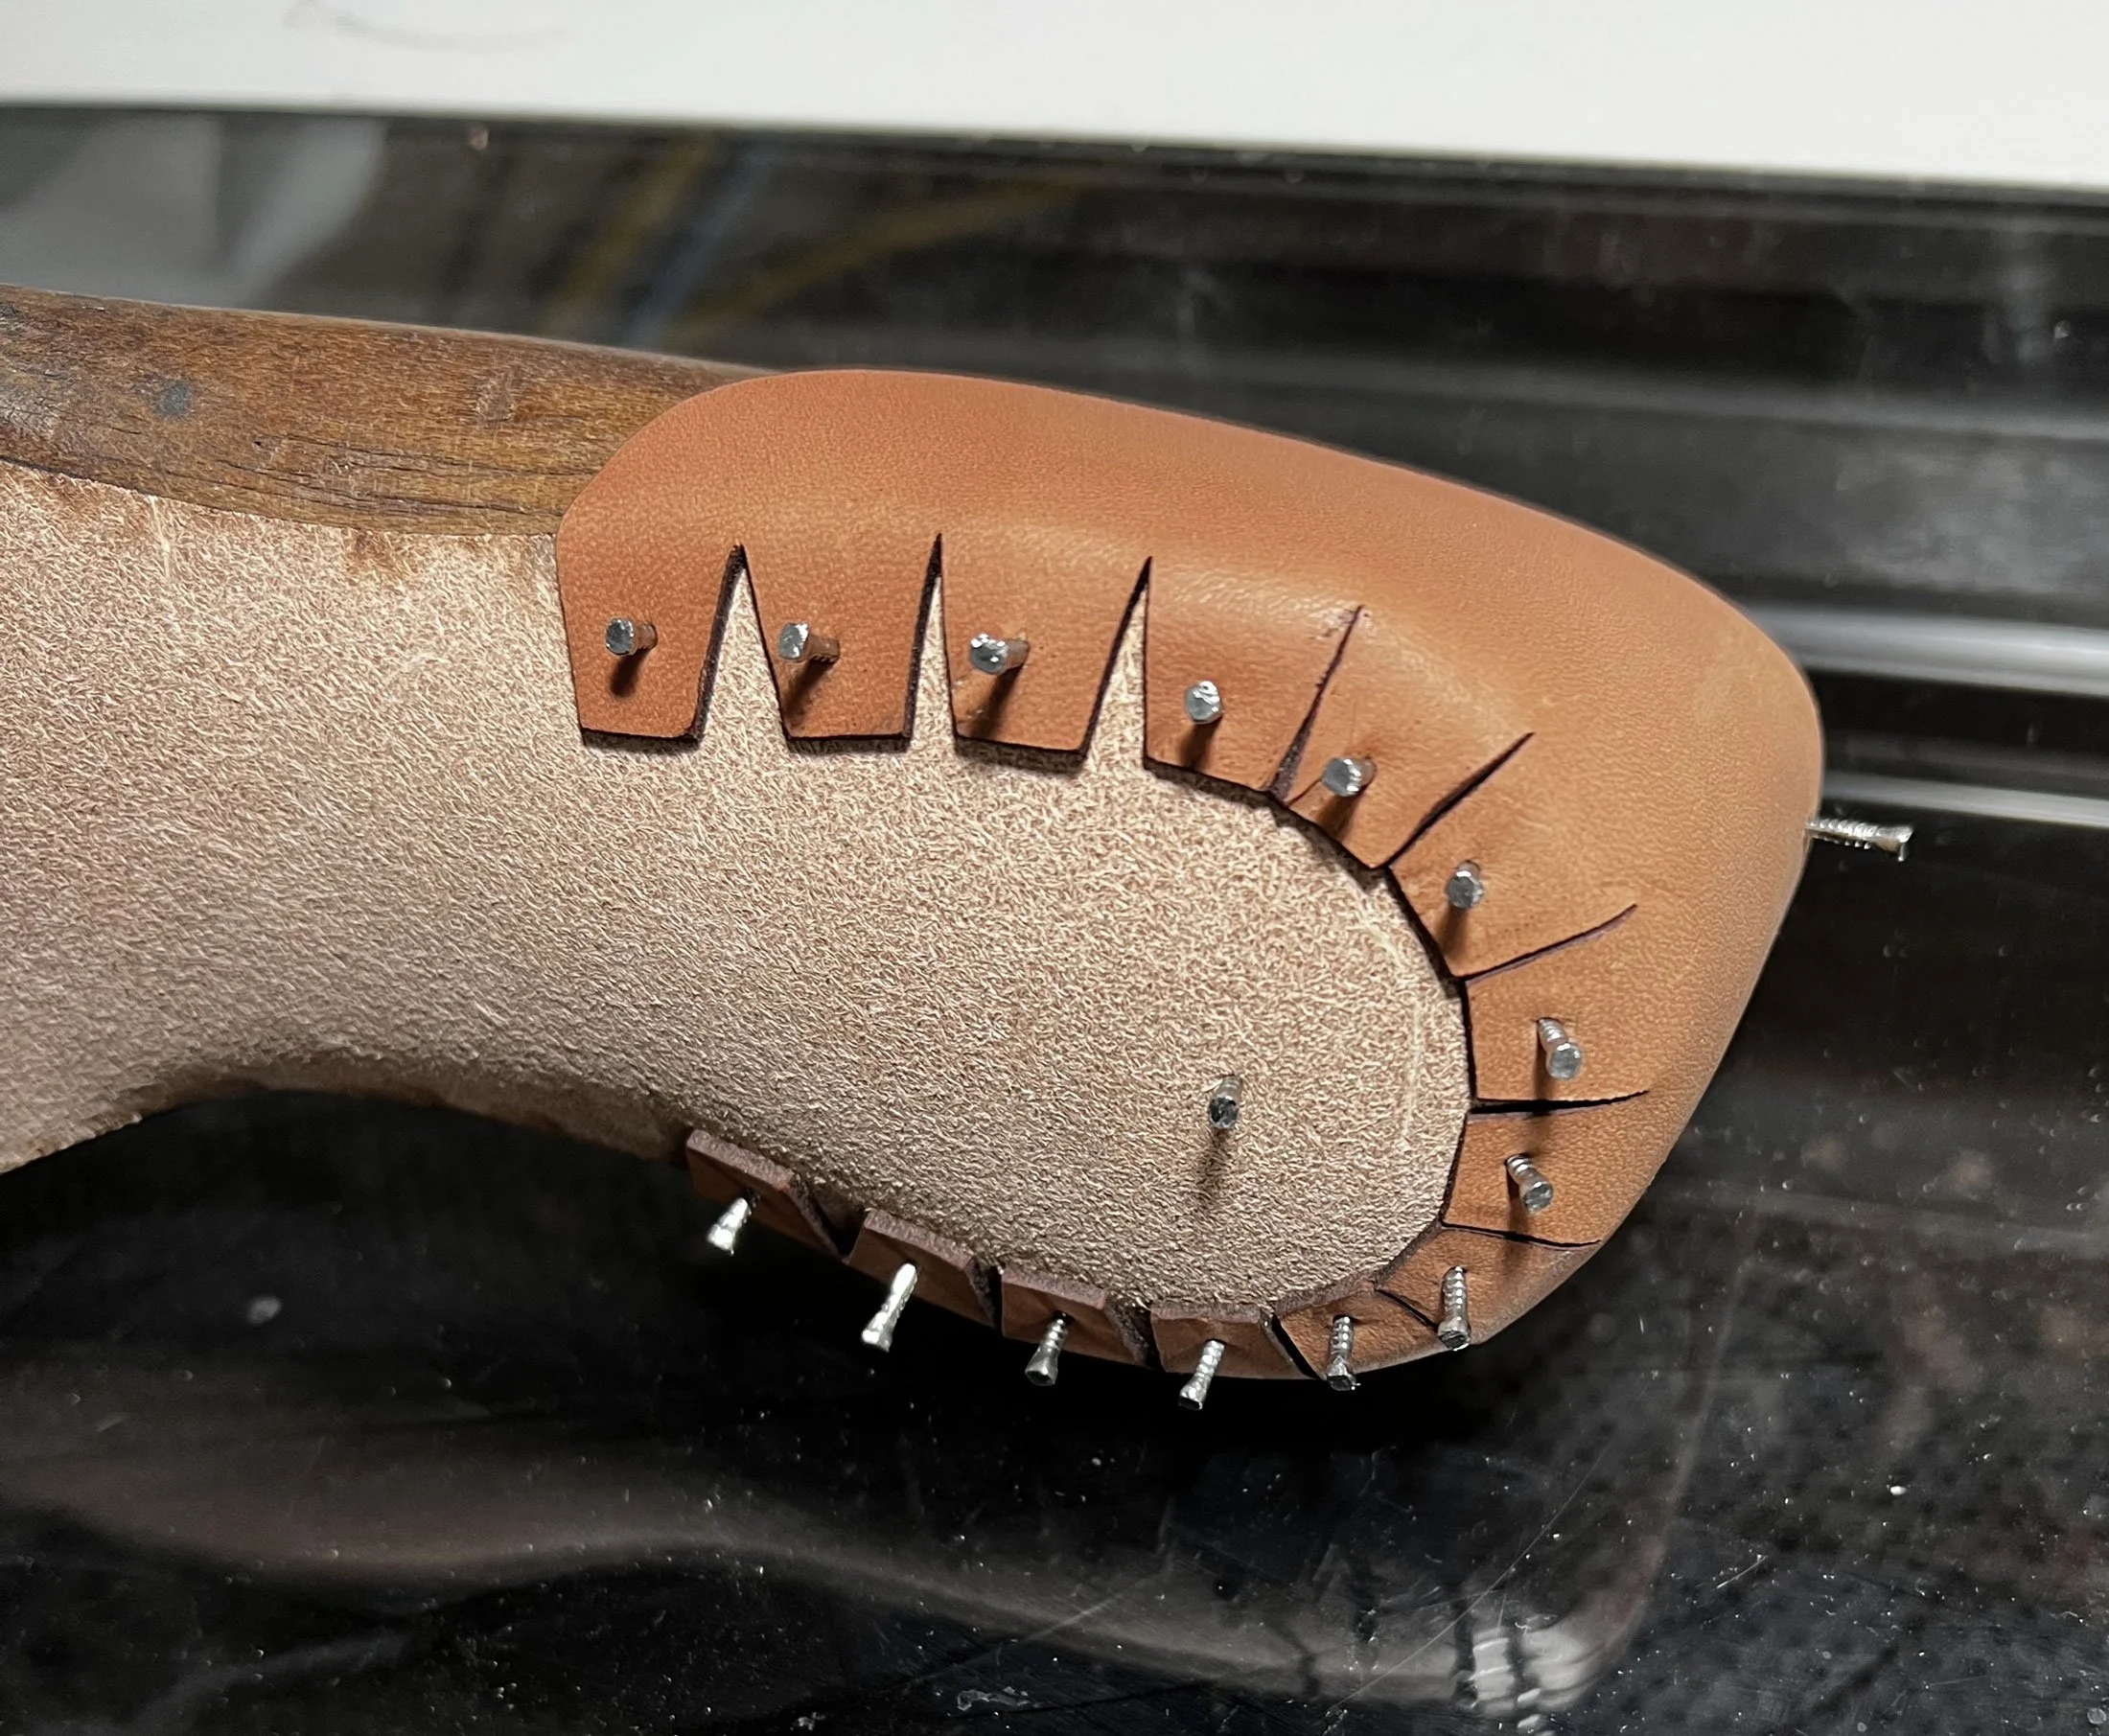
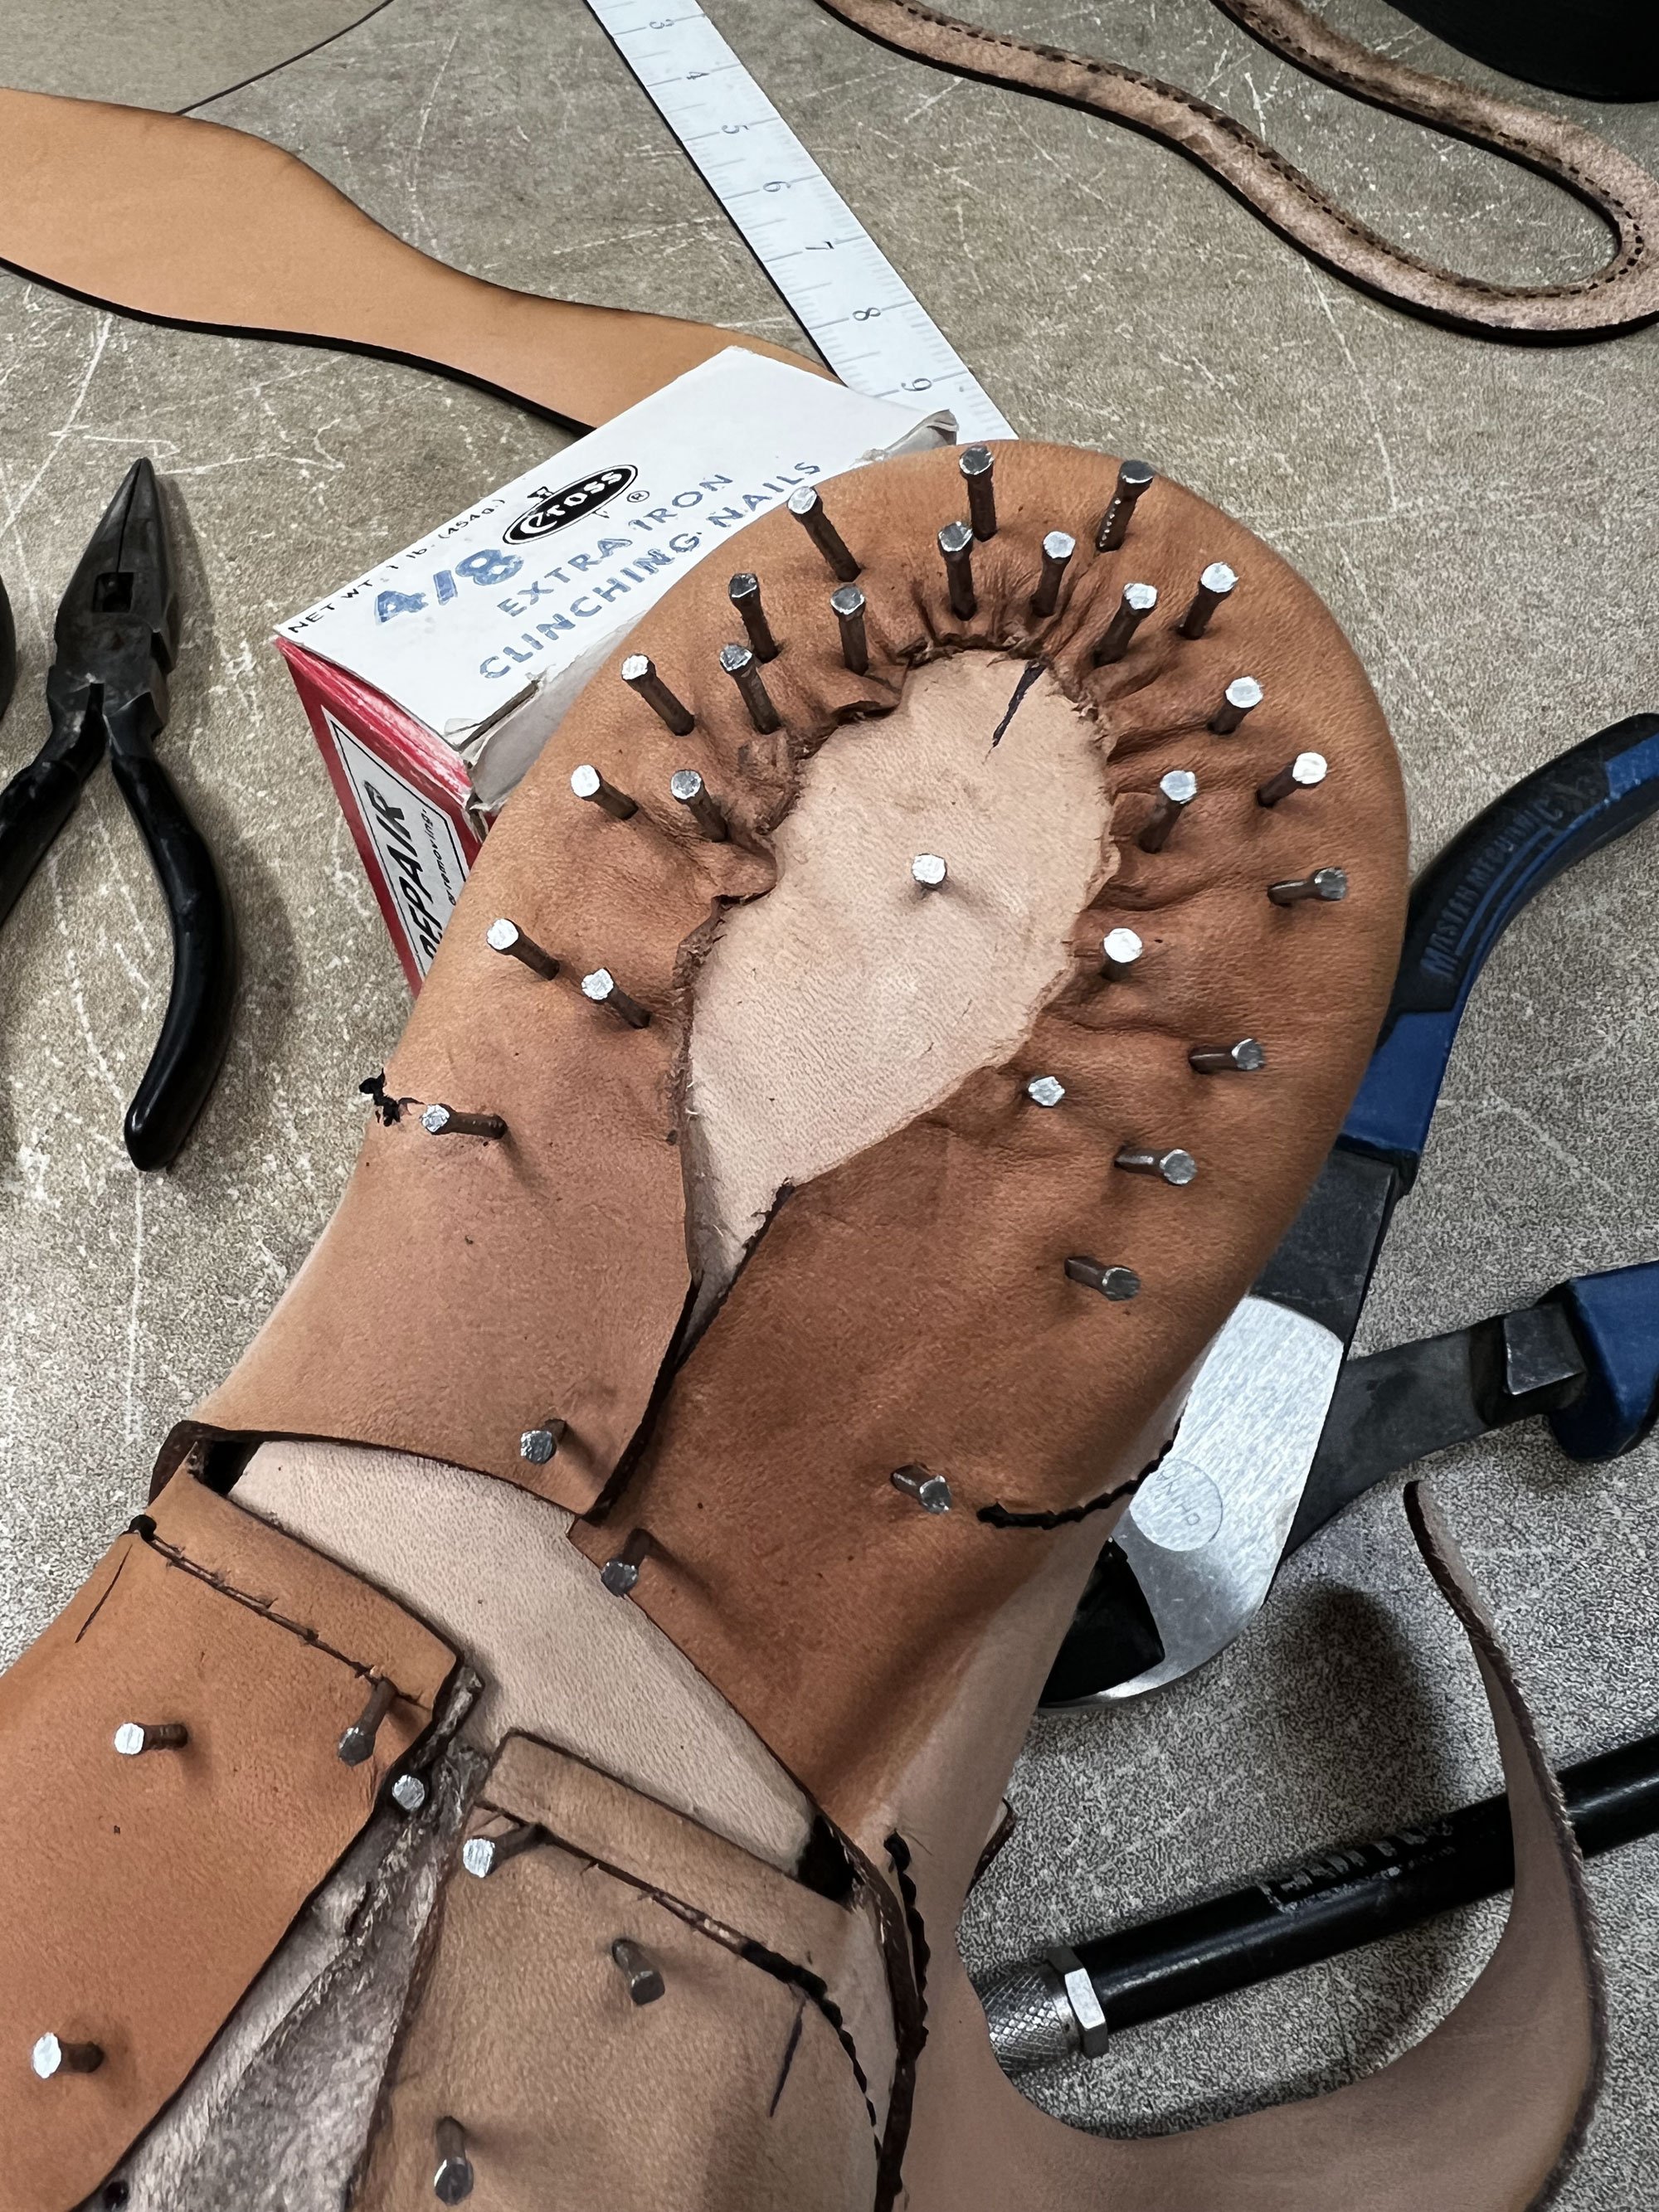
After it was dry I pulled the damp stitched-together uppers over the last and began tacking down the leather on the bottom, stretching it as evenly as I could, with 4/8 clinching nails.
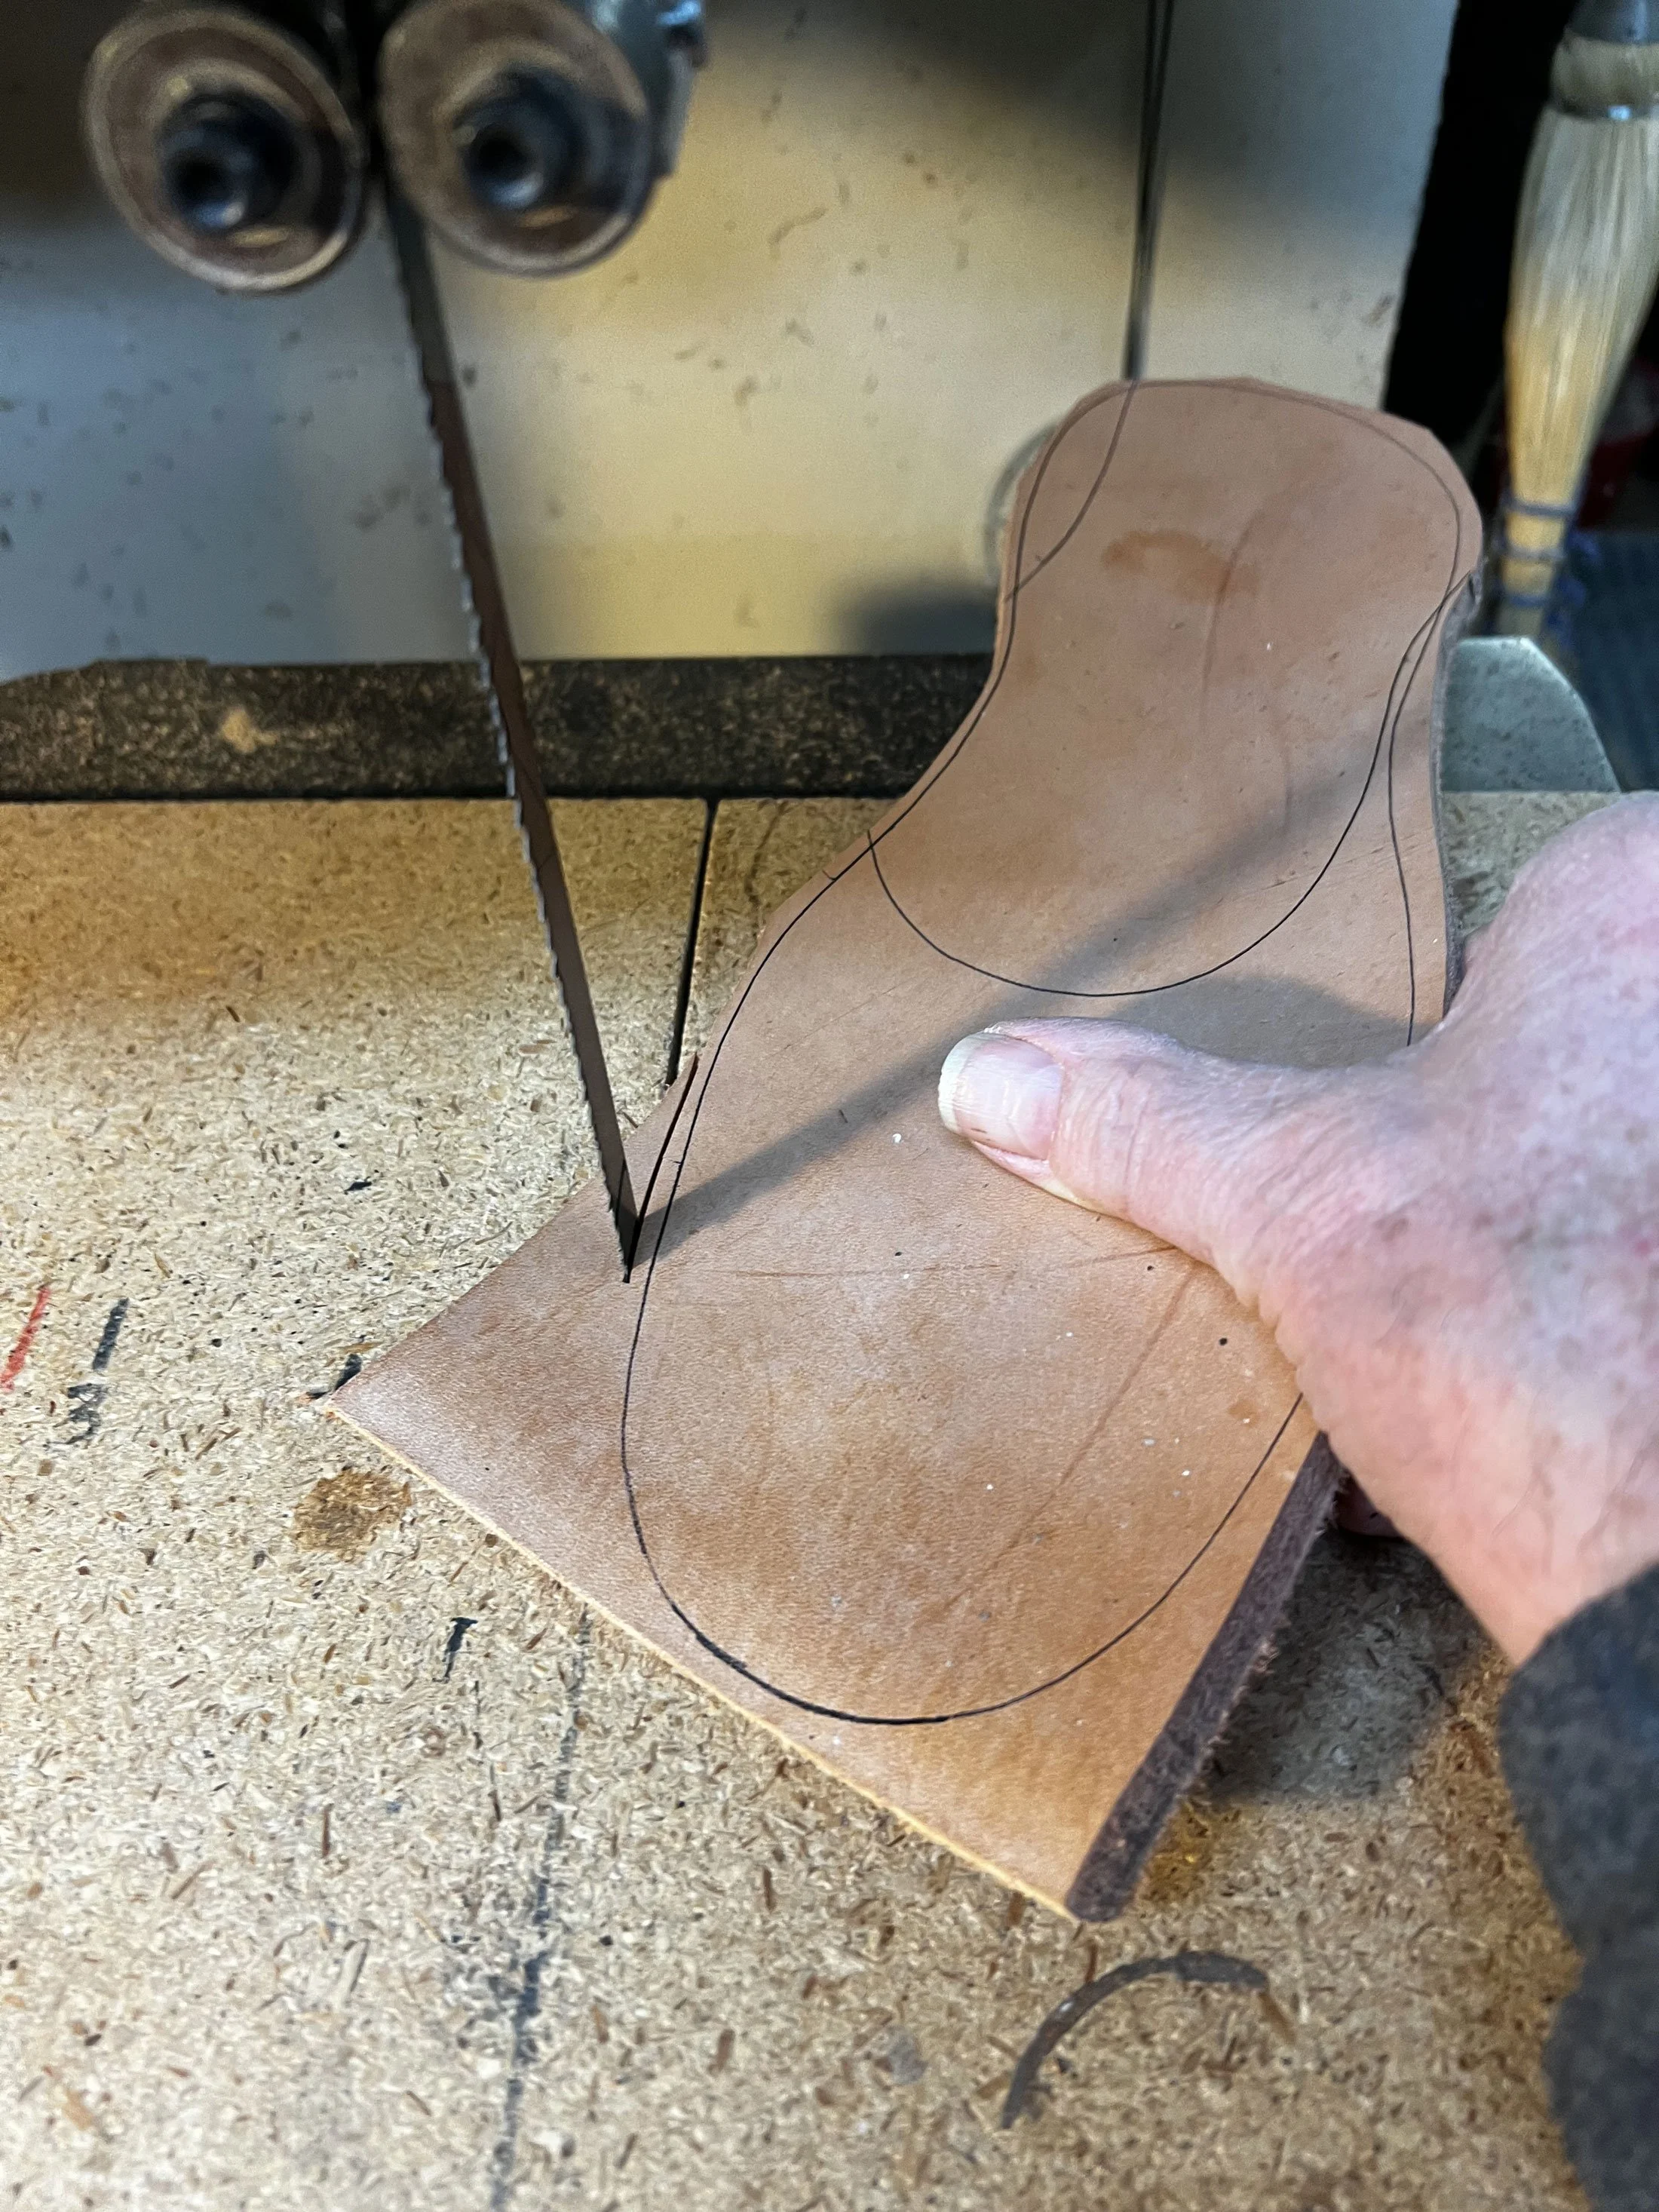
For the sole I used a piece of 12 oz veg tan sole leather, tracing the pattern and cutting it out oversized with a bandsaw. This leather measures about ¼” thick (7mm).

Once the cement was cured after about ten minutes, I marked where the heel would go on the bottom of the sole, scuffing up both surfaces to better hold the cement.

Back to the Drum Sander for Smoothing Out the Heel
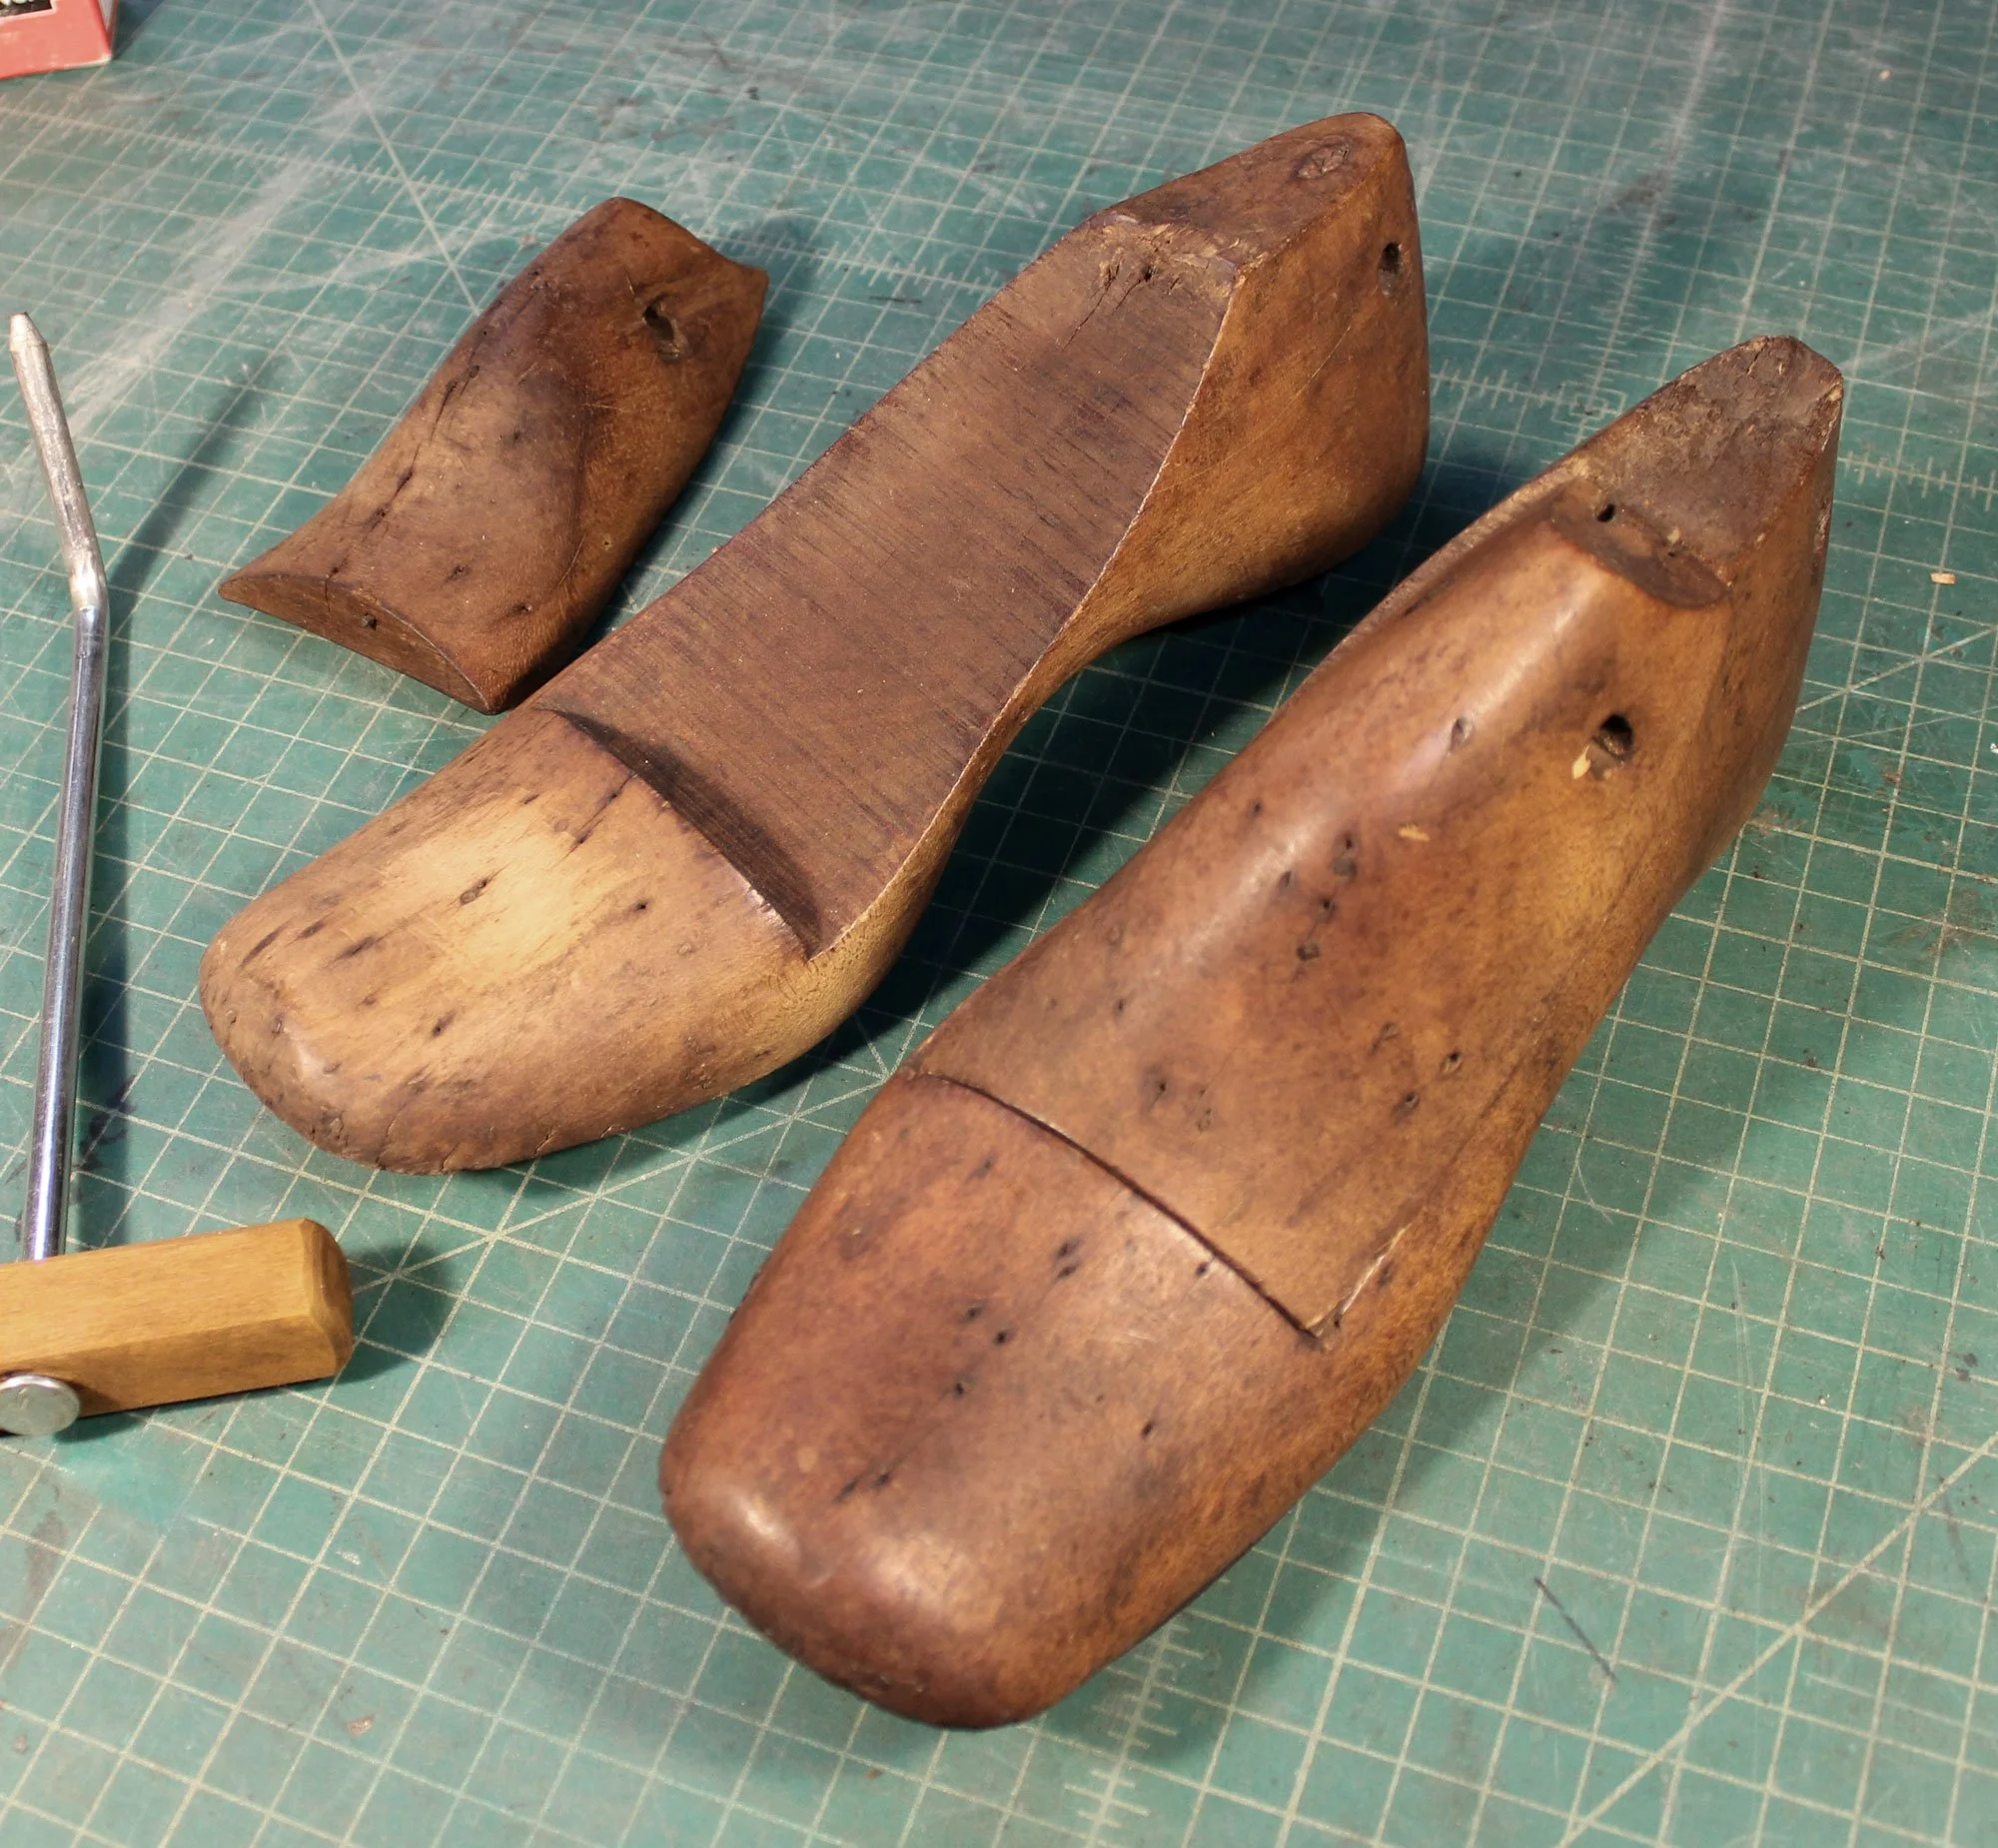
I made just the single right shoe as I expected many mistakes as I learned about shoemaking. No need to make the pair. Before starting I bought a tool that I would need: Lasting pliers for stretching the leather over the toes and heel.
I also built a last extraction tool for removing the last after the shoe was done, by buying a large nail, adding a wooden handle and bending the end of the nail over. It just fits into the holes on my last that are made for this purpose.
Masking Tape on Chipboard
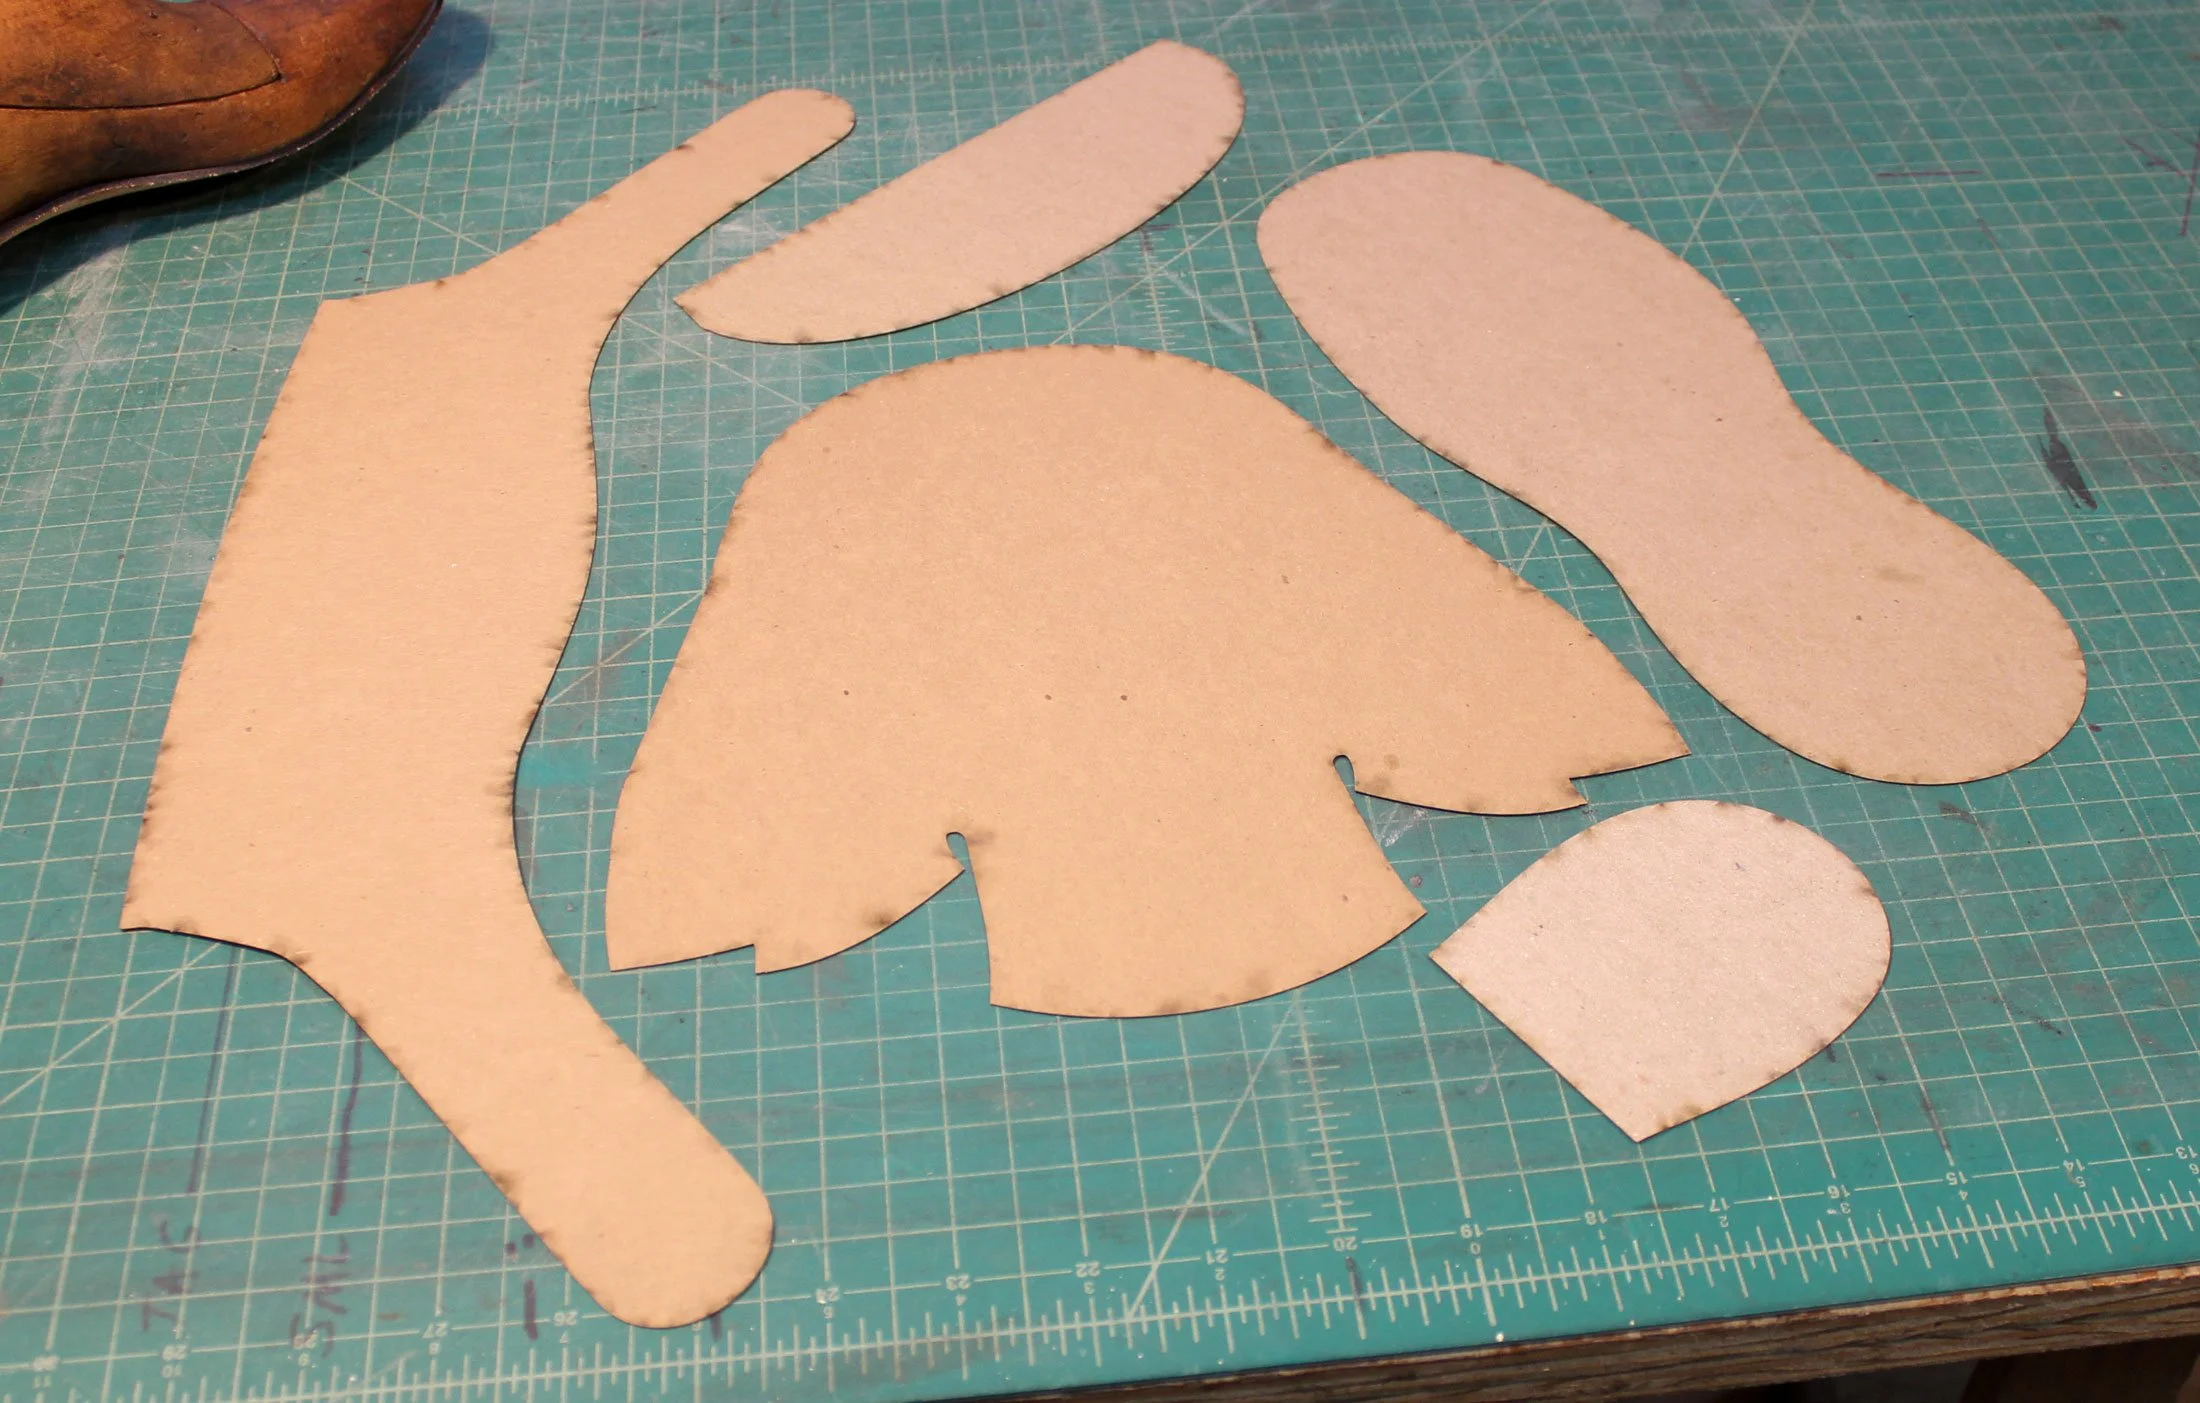
Final Patterns in Chipboard
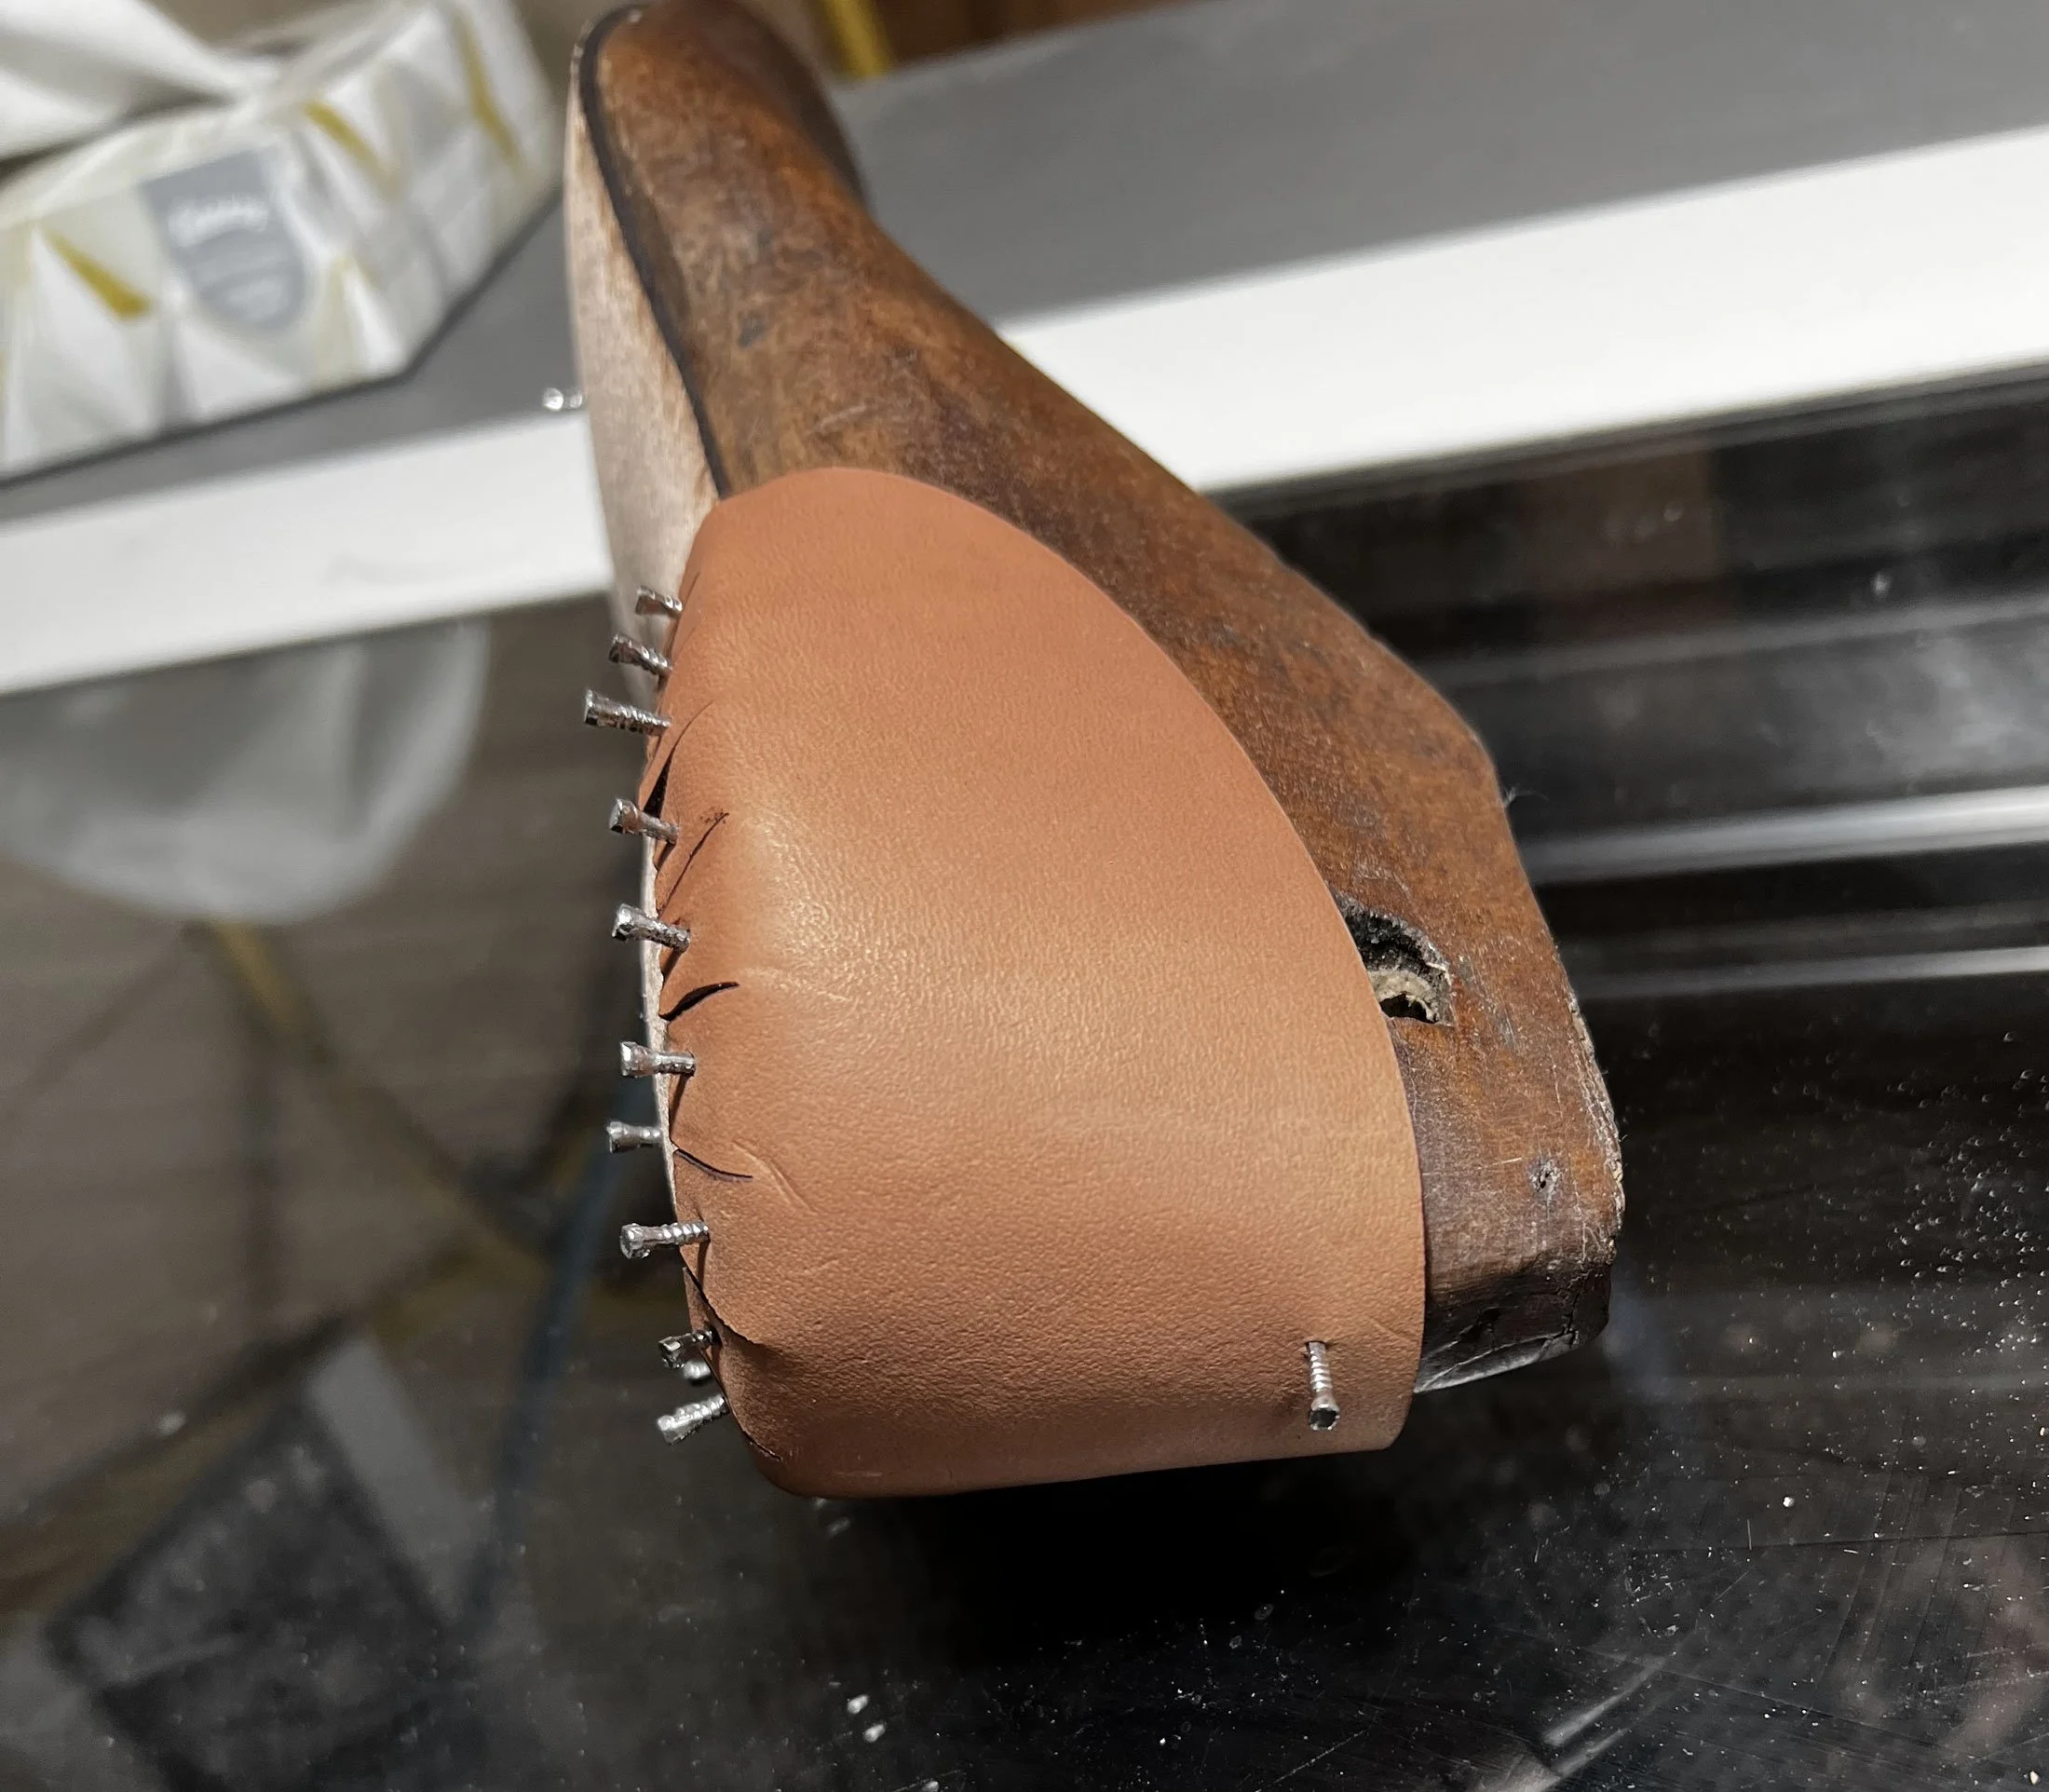
Damp 4 oz Veg Tan Counter Drying Around the Heel of the Last. Note the Clinching Nails Holding it in Place.
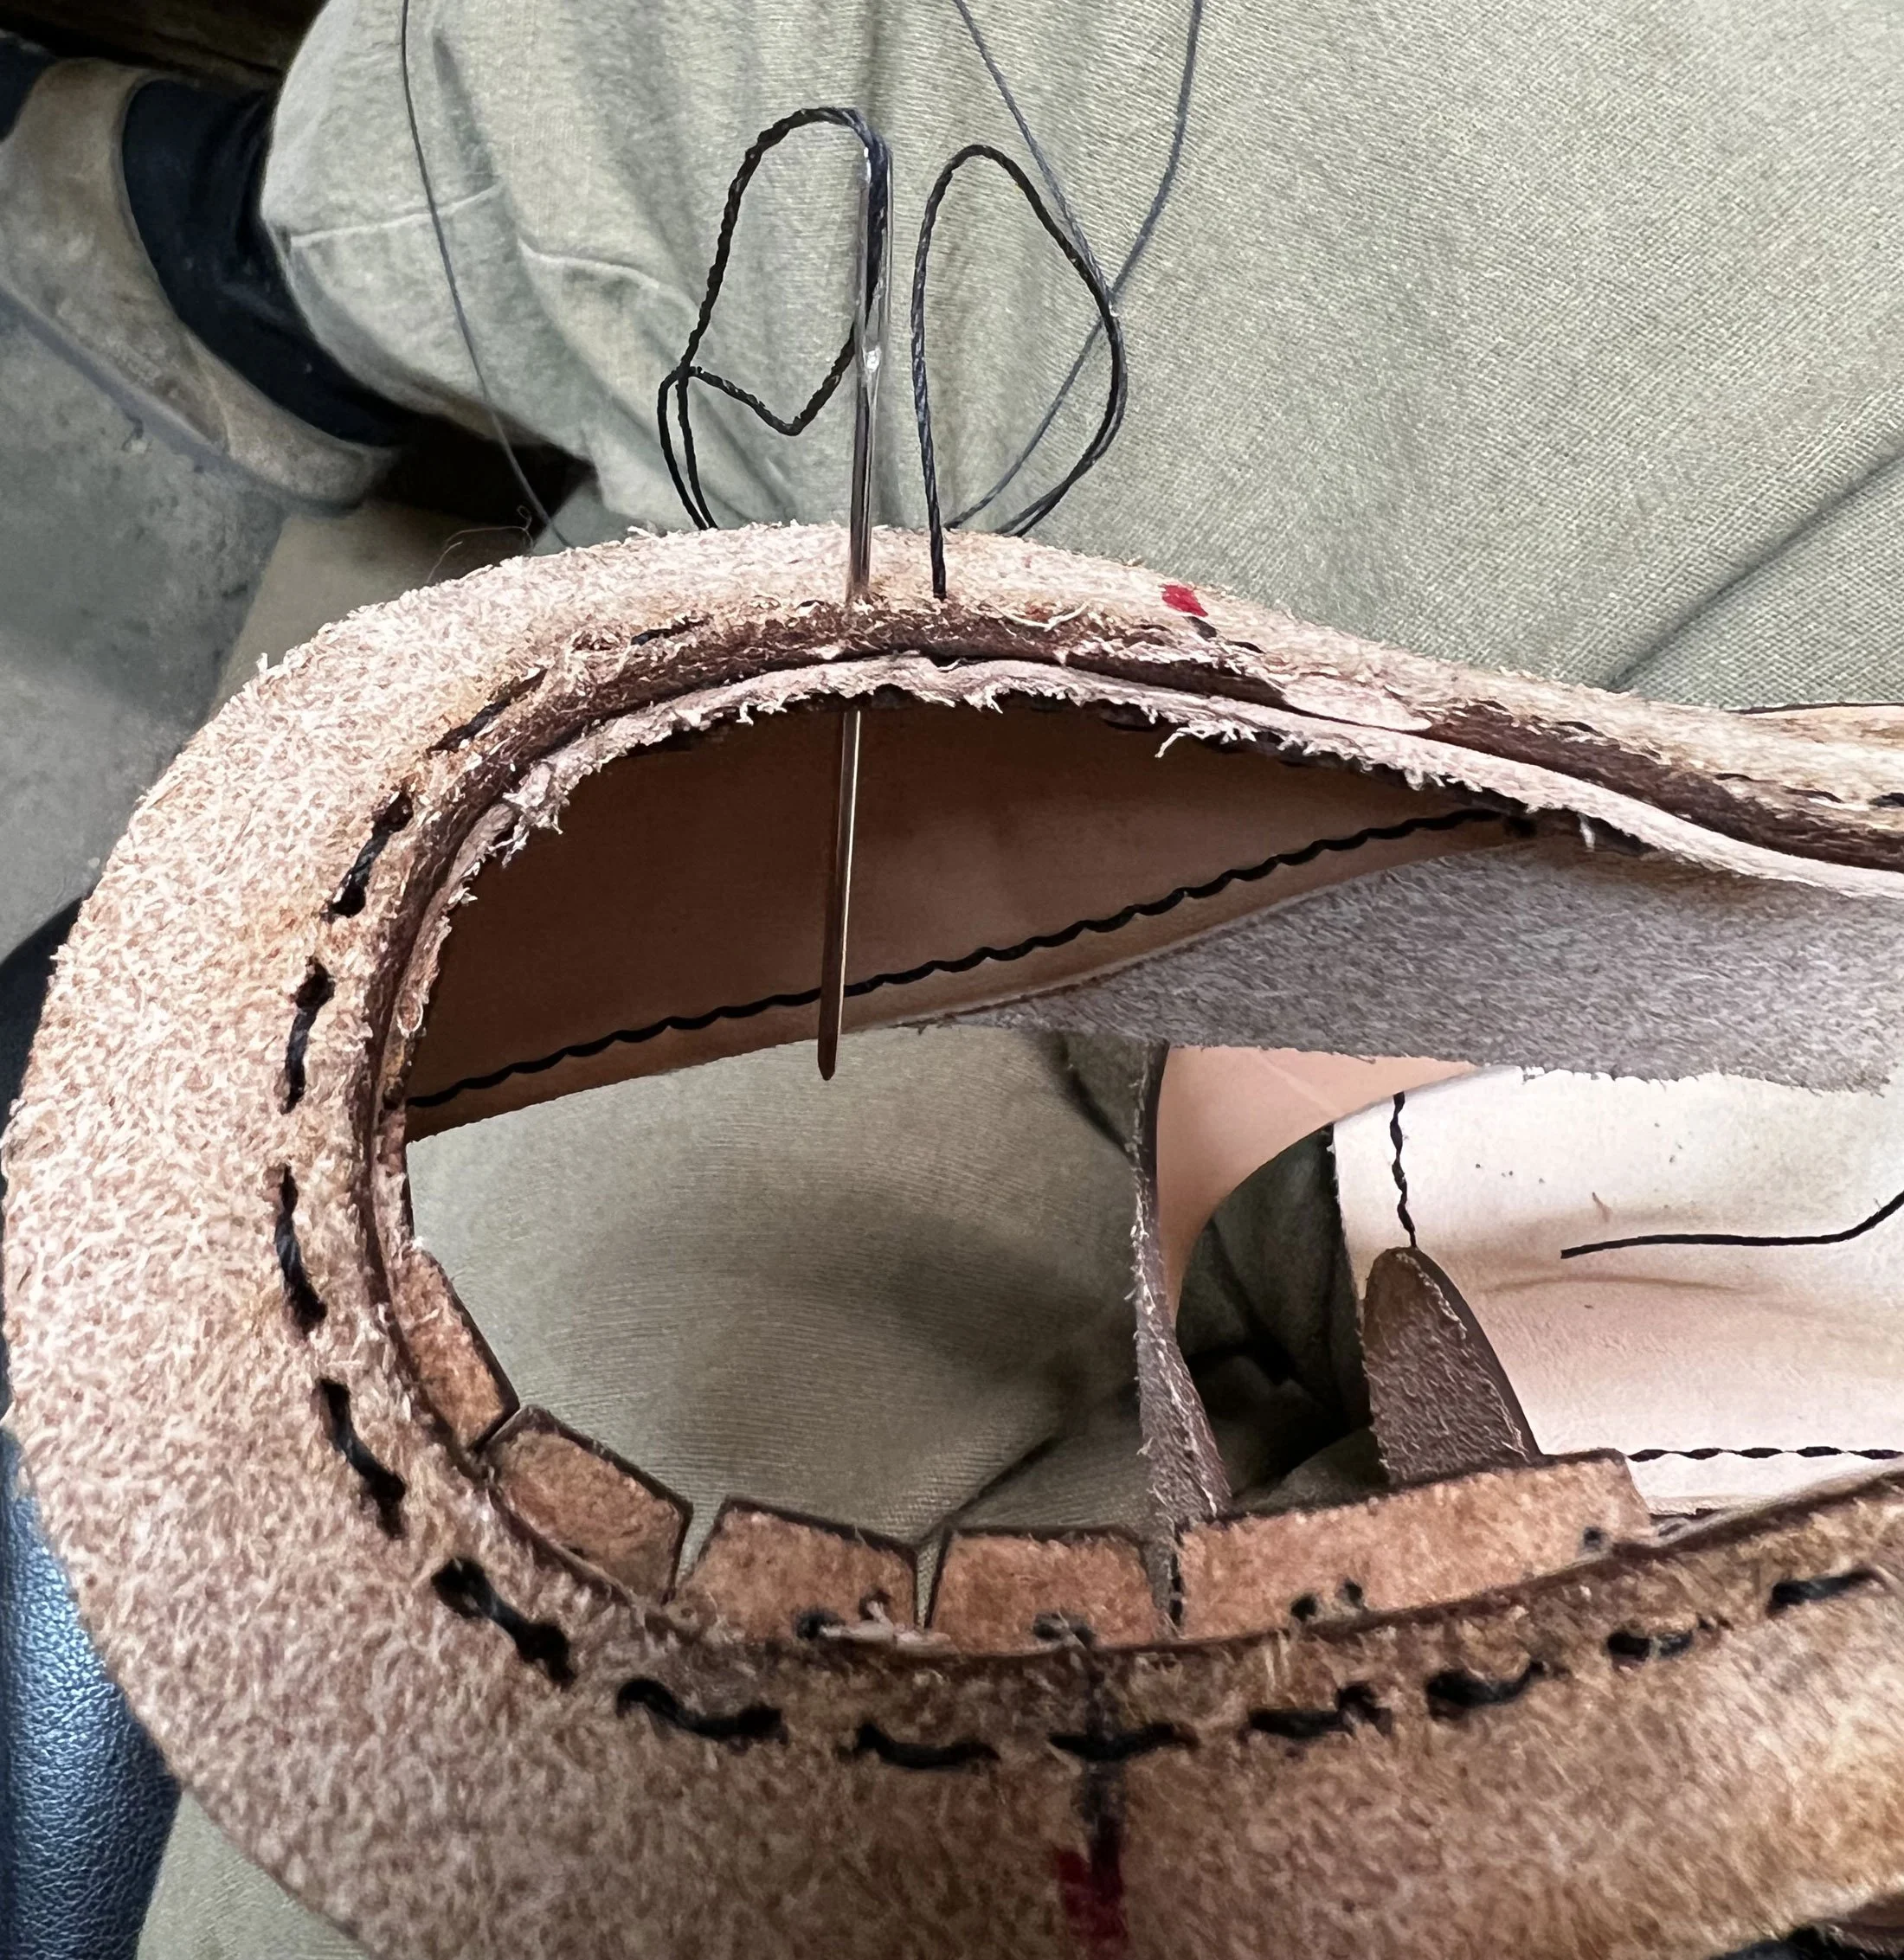
Hand stitching the welt to the uppers.
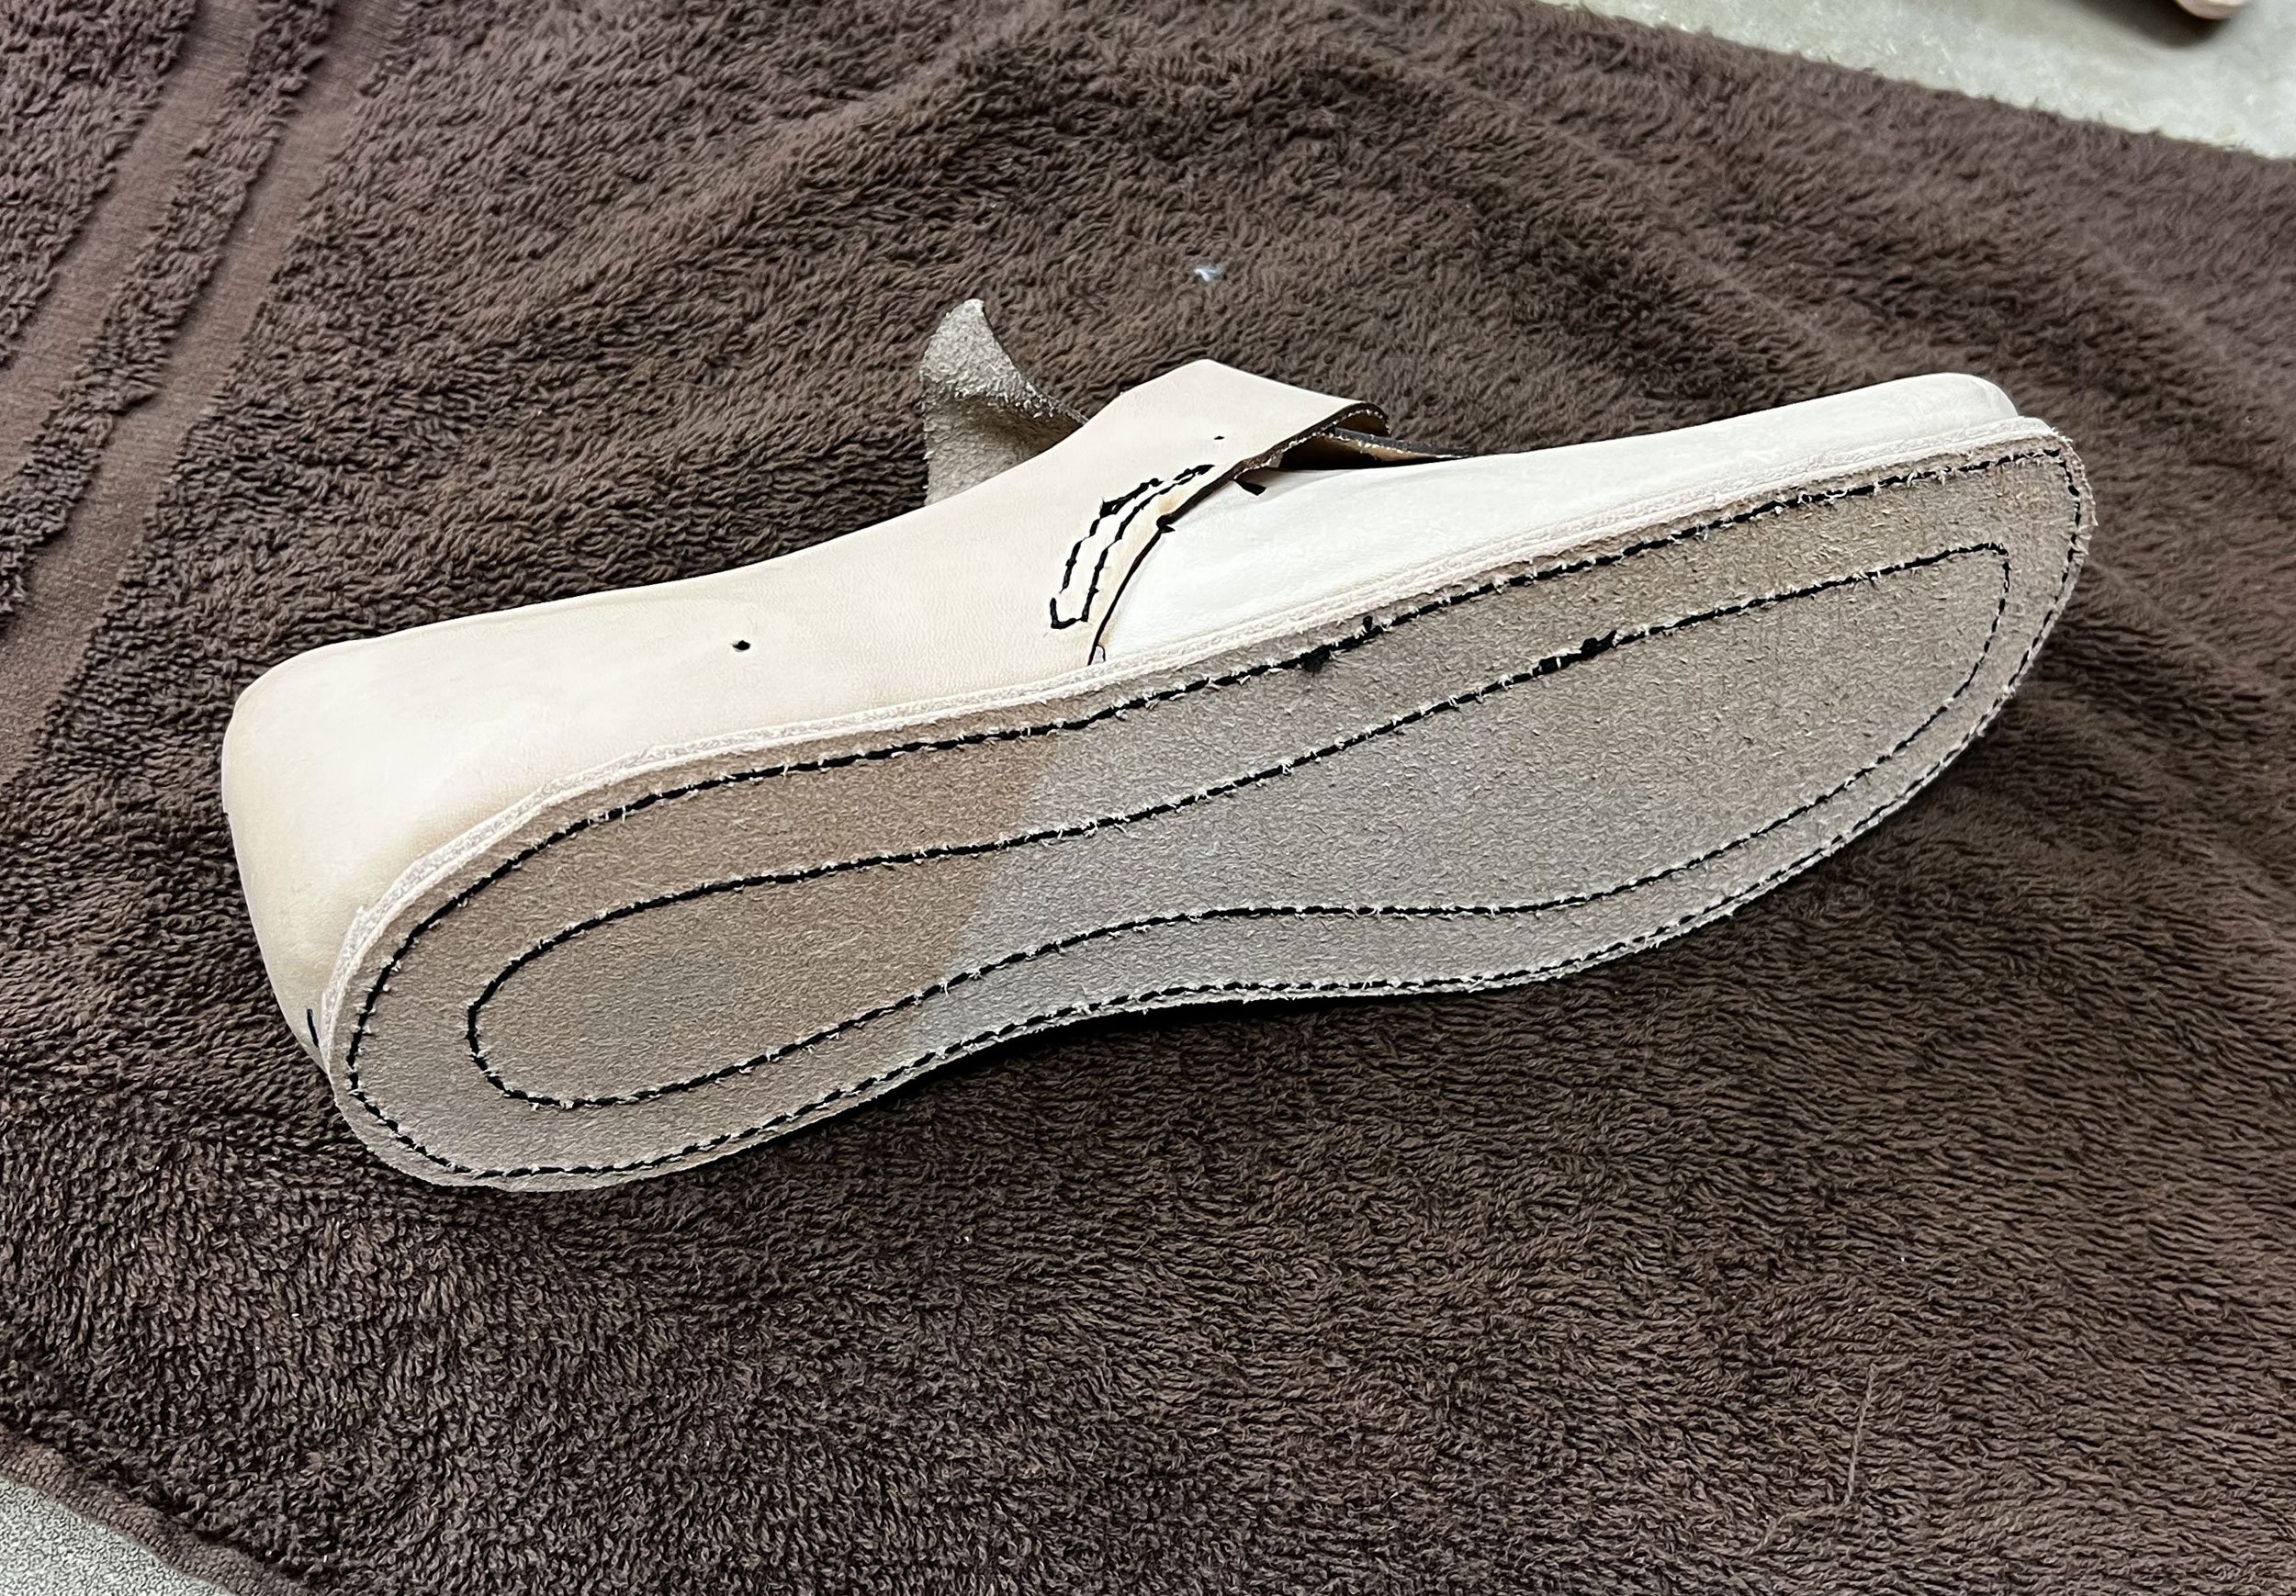
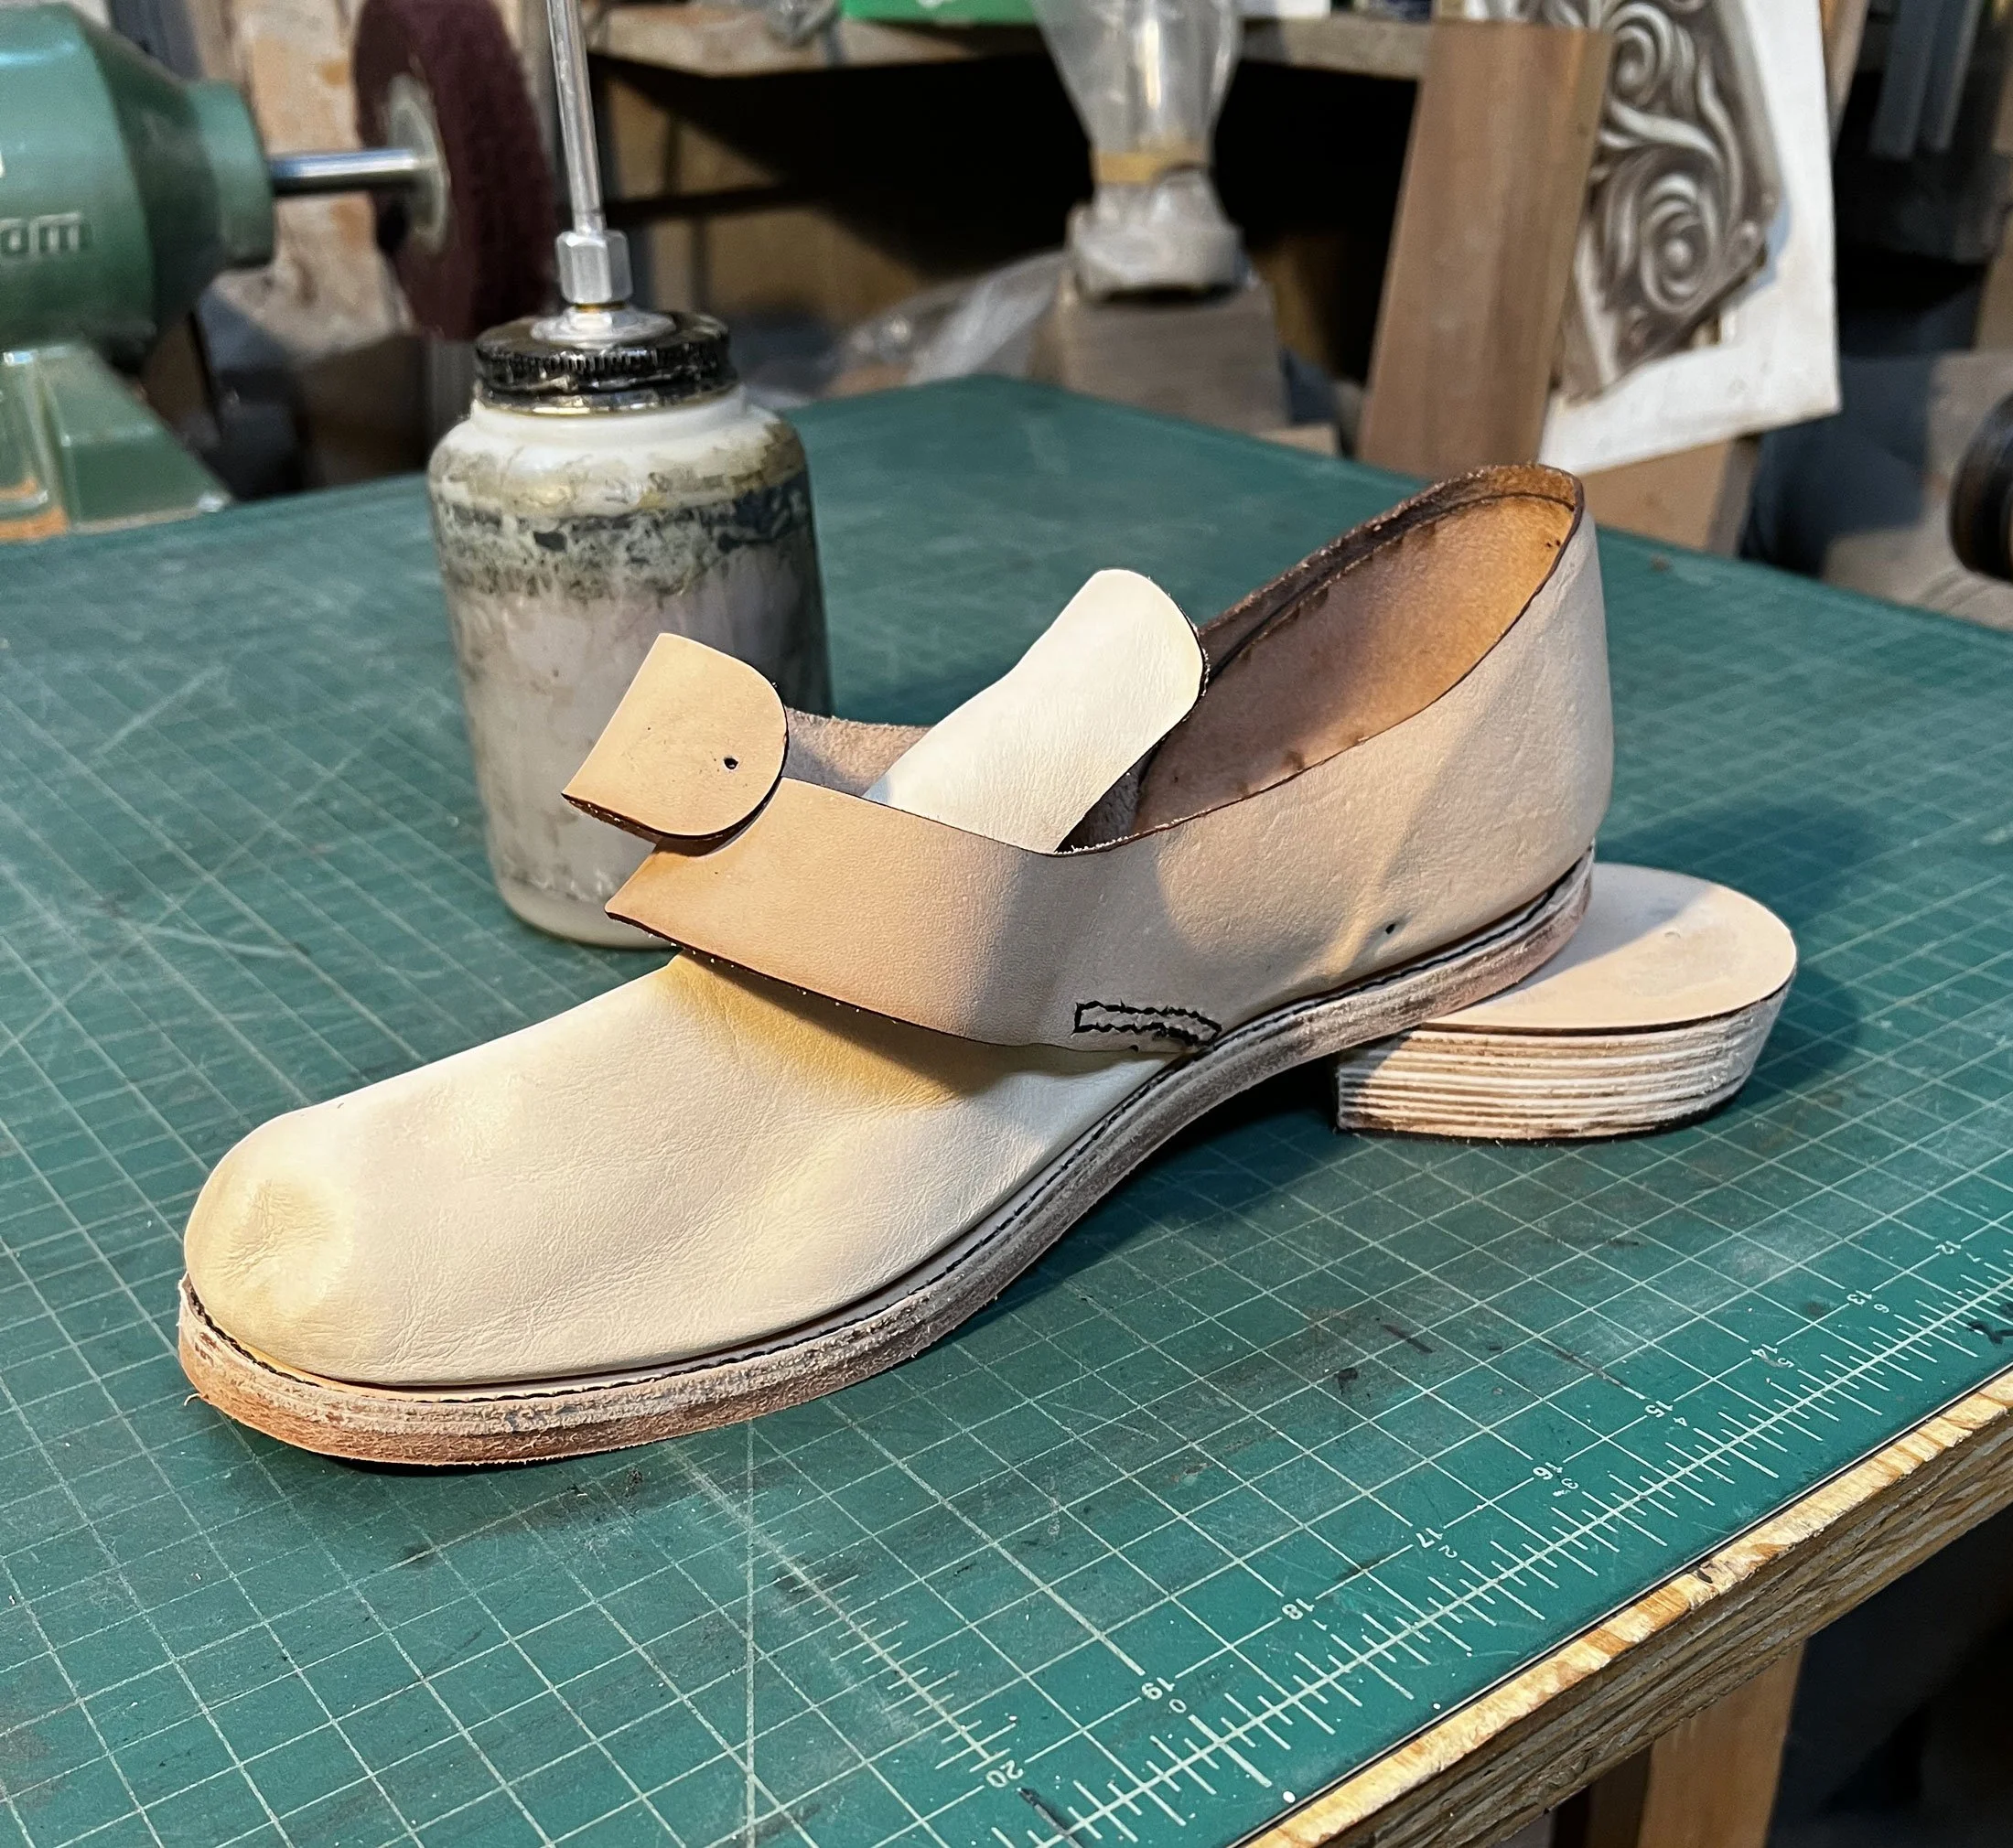
Once the uppers were dry, I cut a welt, which is a narrow strip of leather that runs around the outside of the sole, and holds the uppers to the midsole. I punched holes along its length and after cementing it down, hand-stitched it to the uppers. Next I cut the midsole out of 5-6 oz veg tan and cemented it onto the welt. Then I sewed the two pieces together using my industrial sewing machine, a Cobra Class 4 from Leather Machine Company.
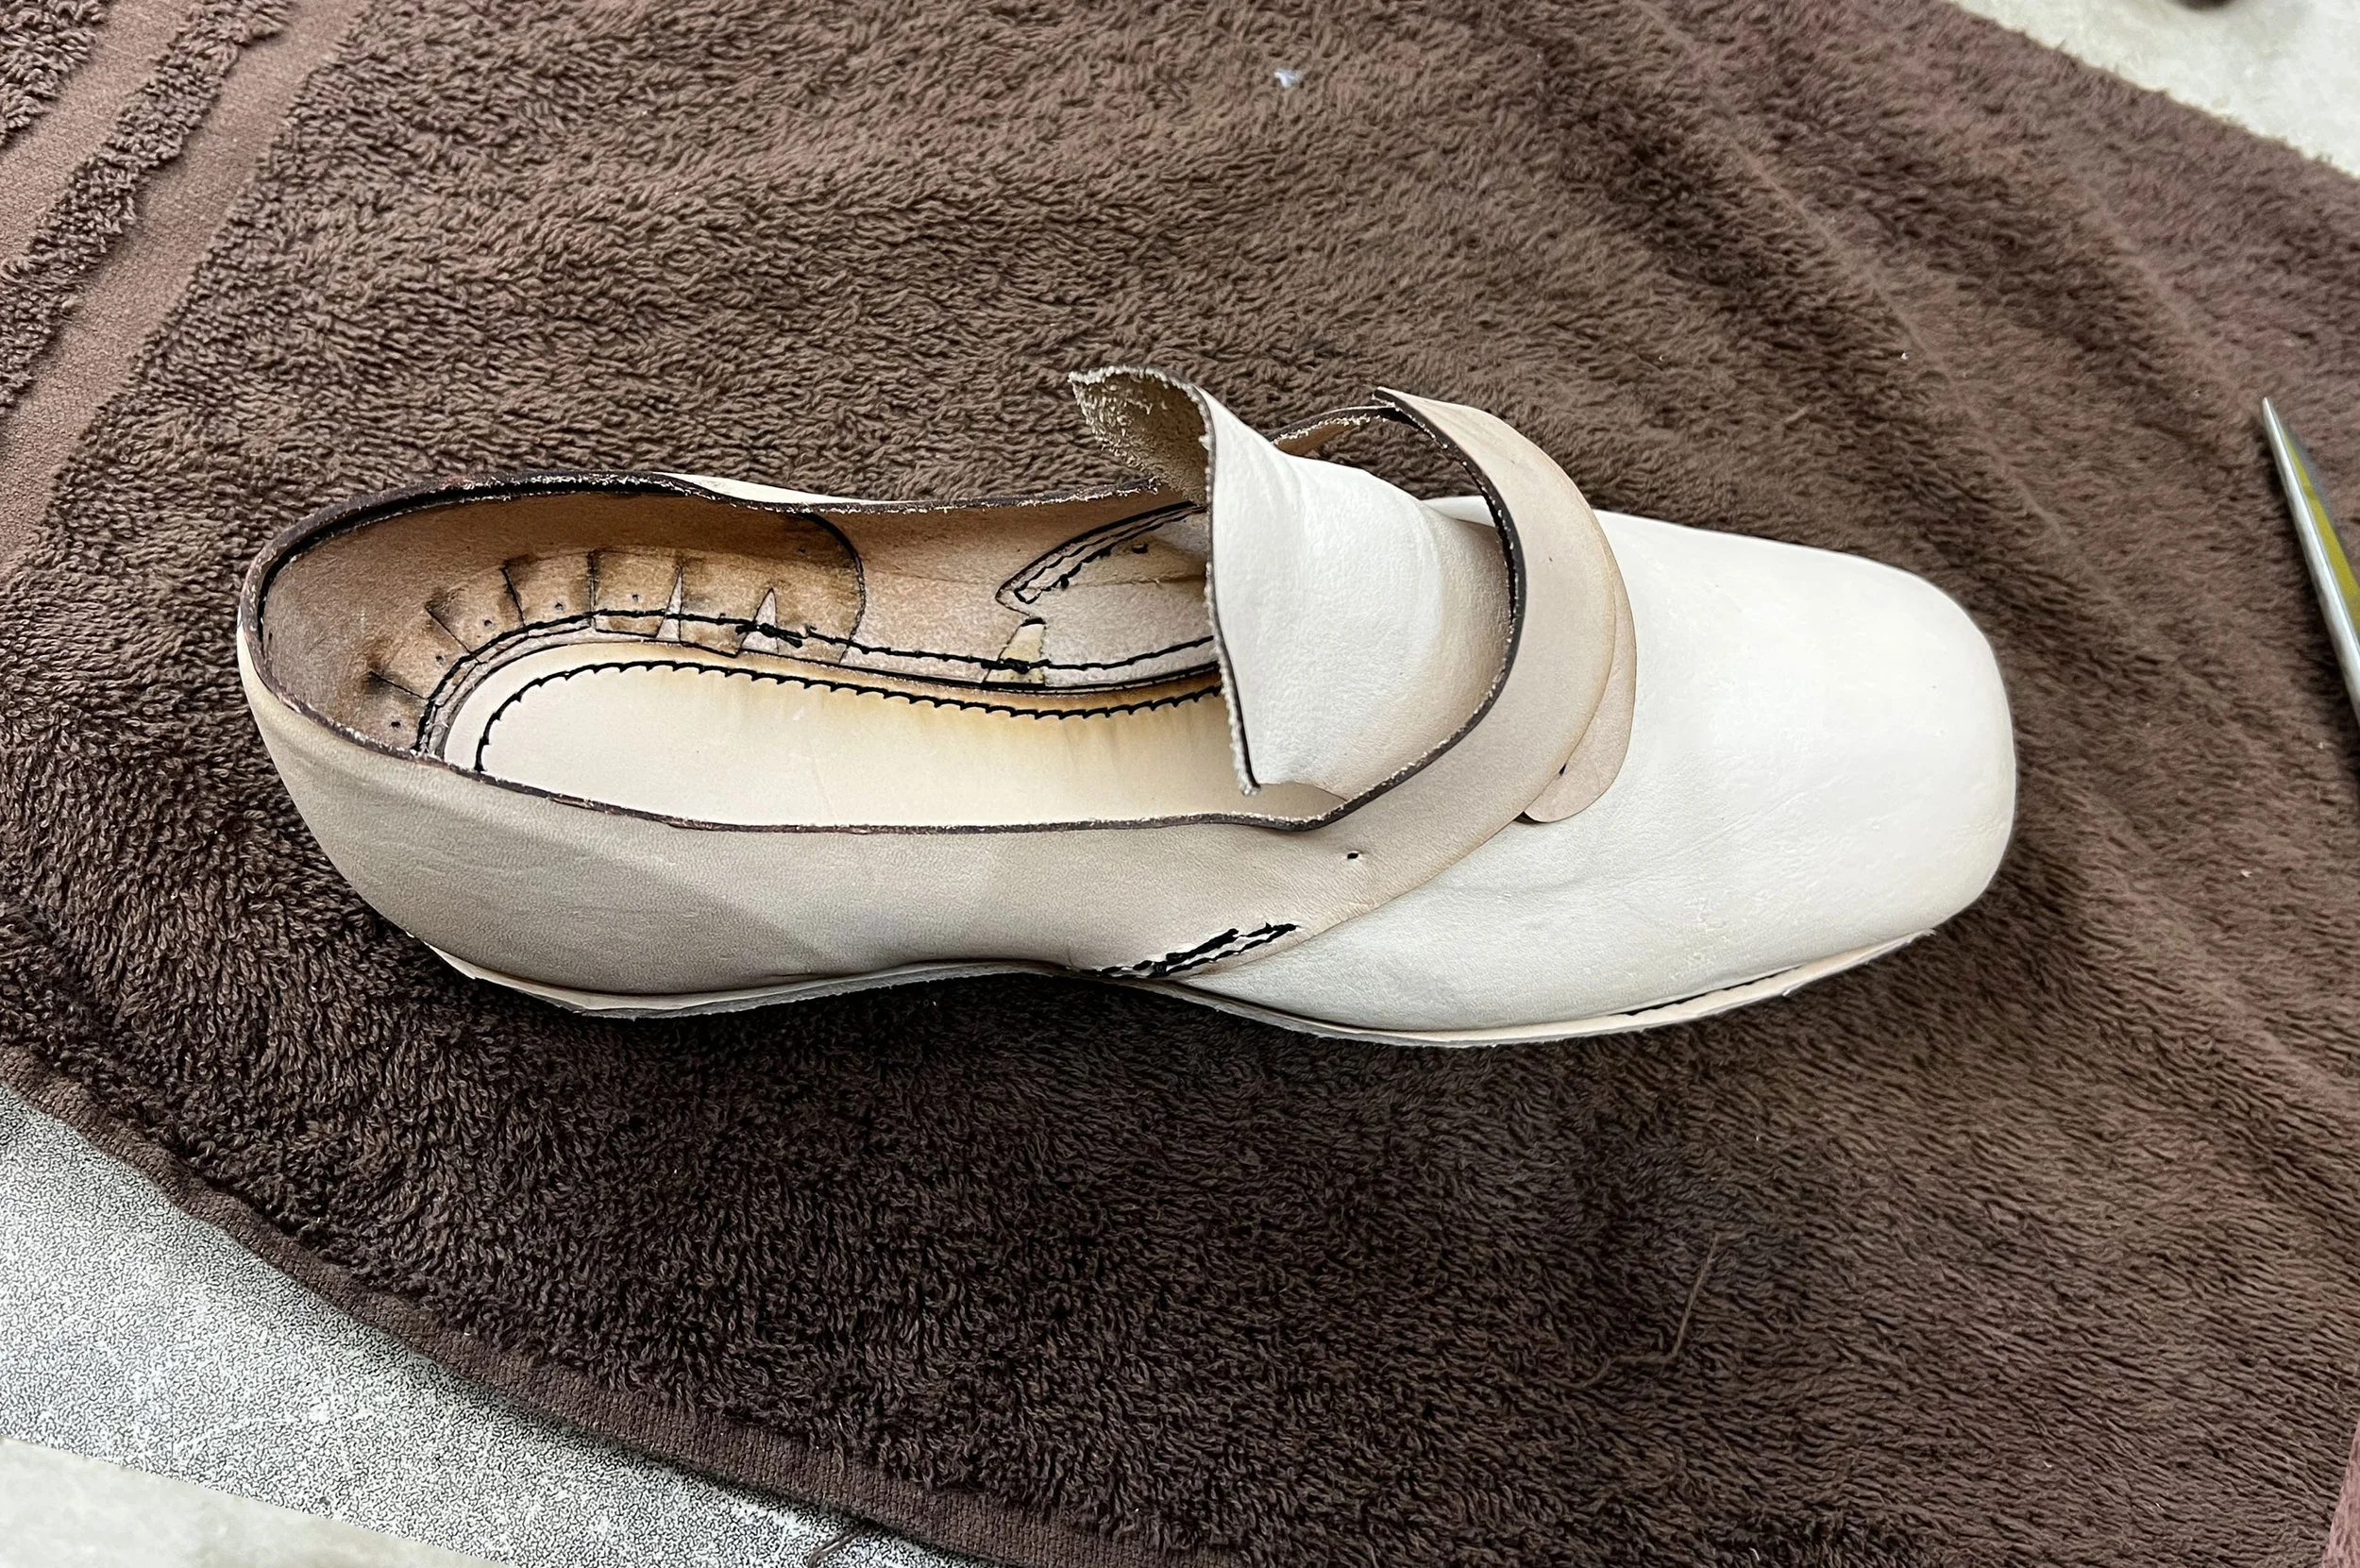
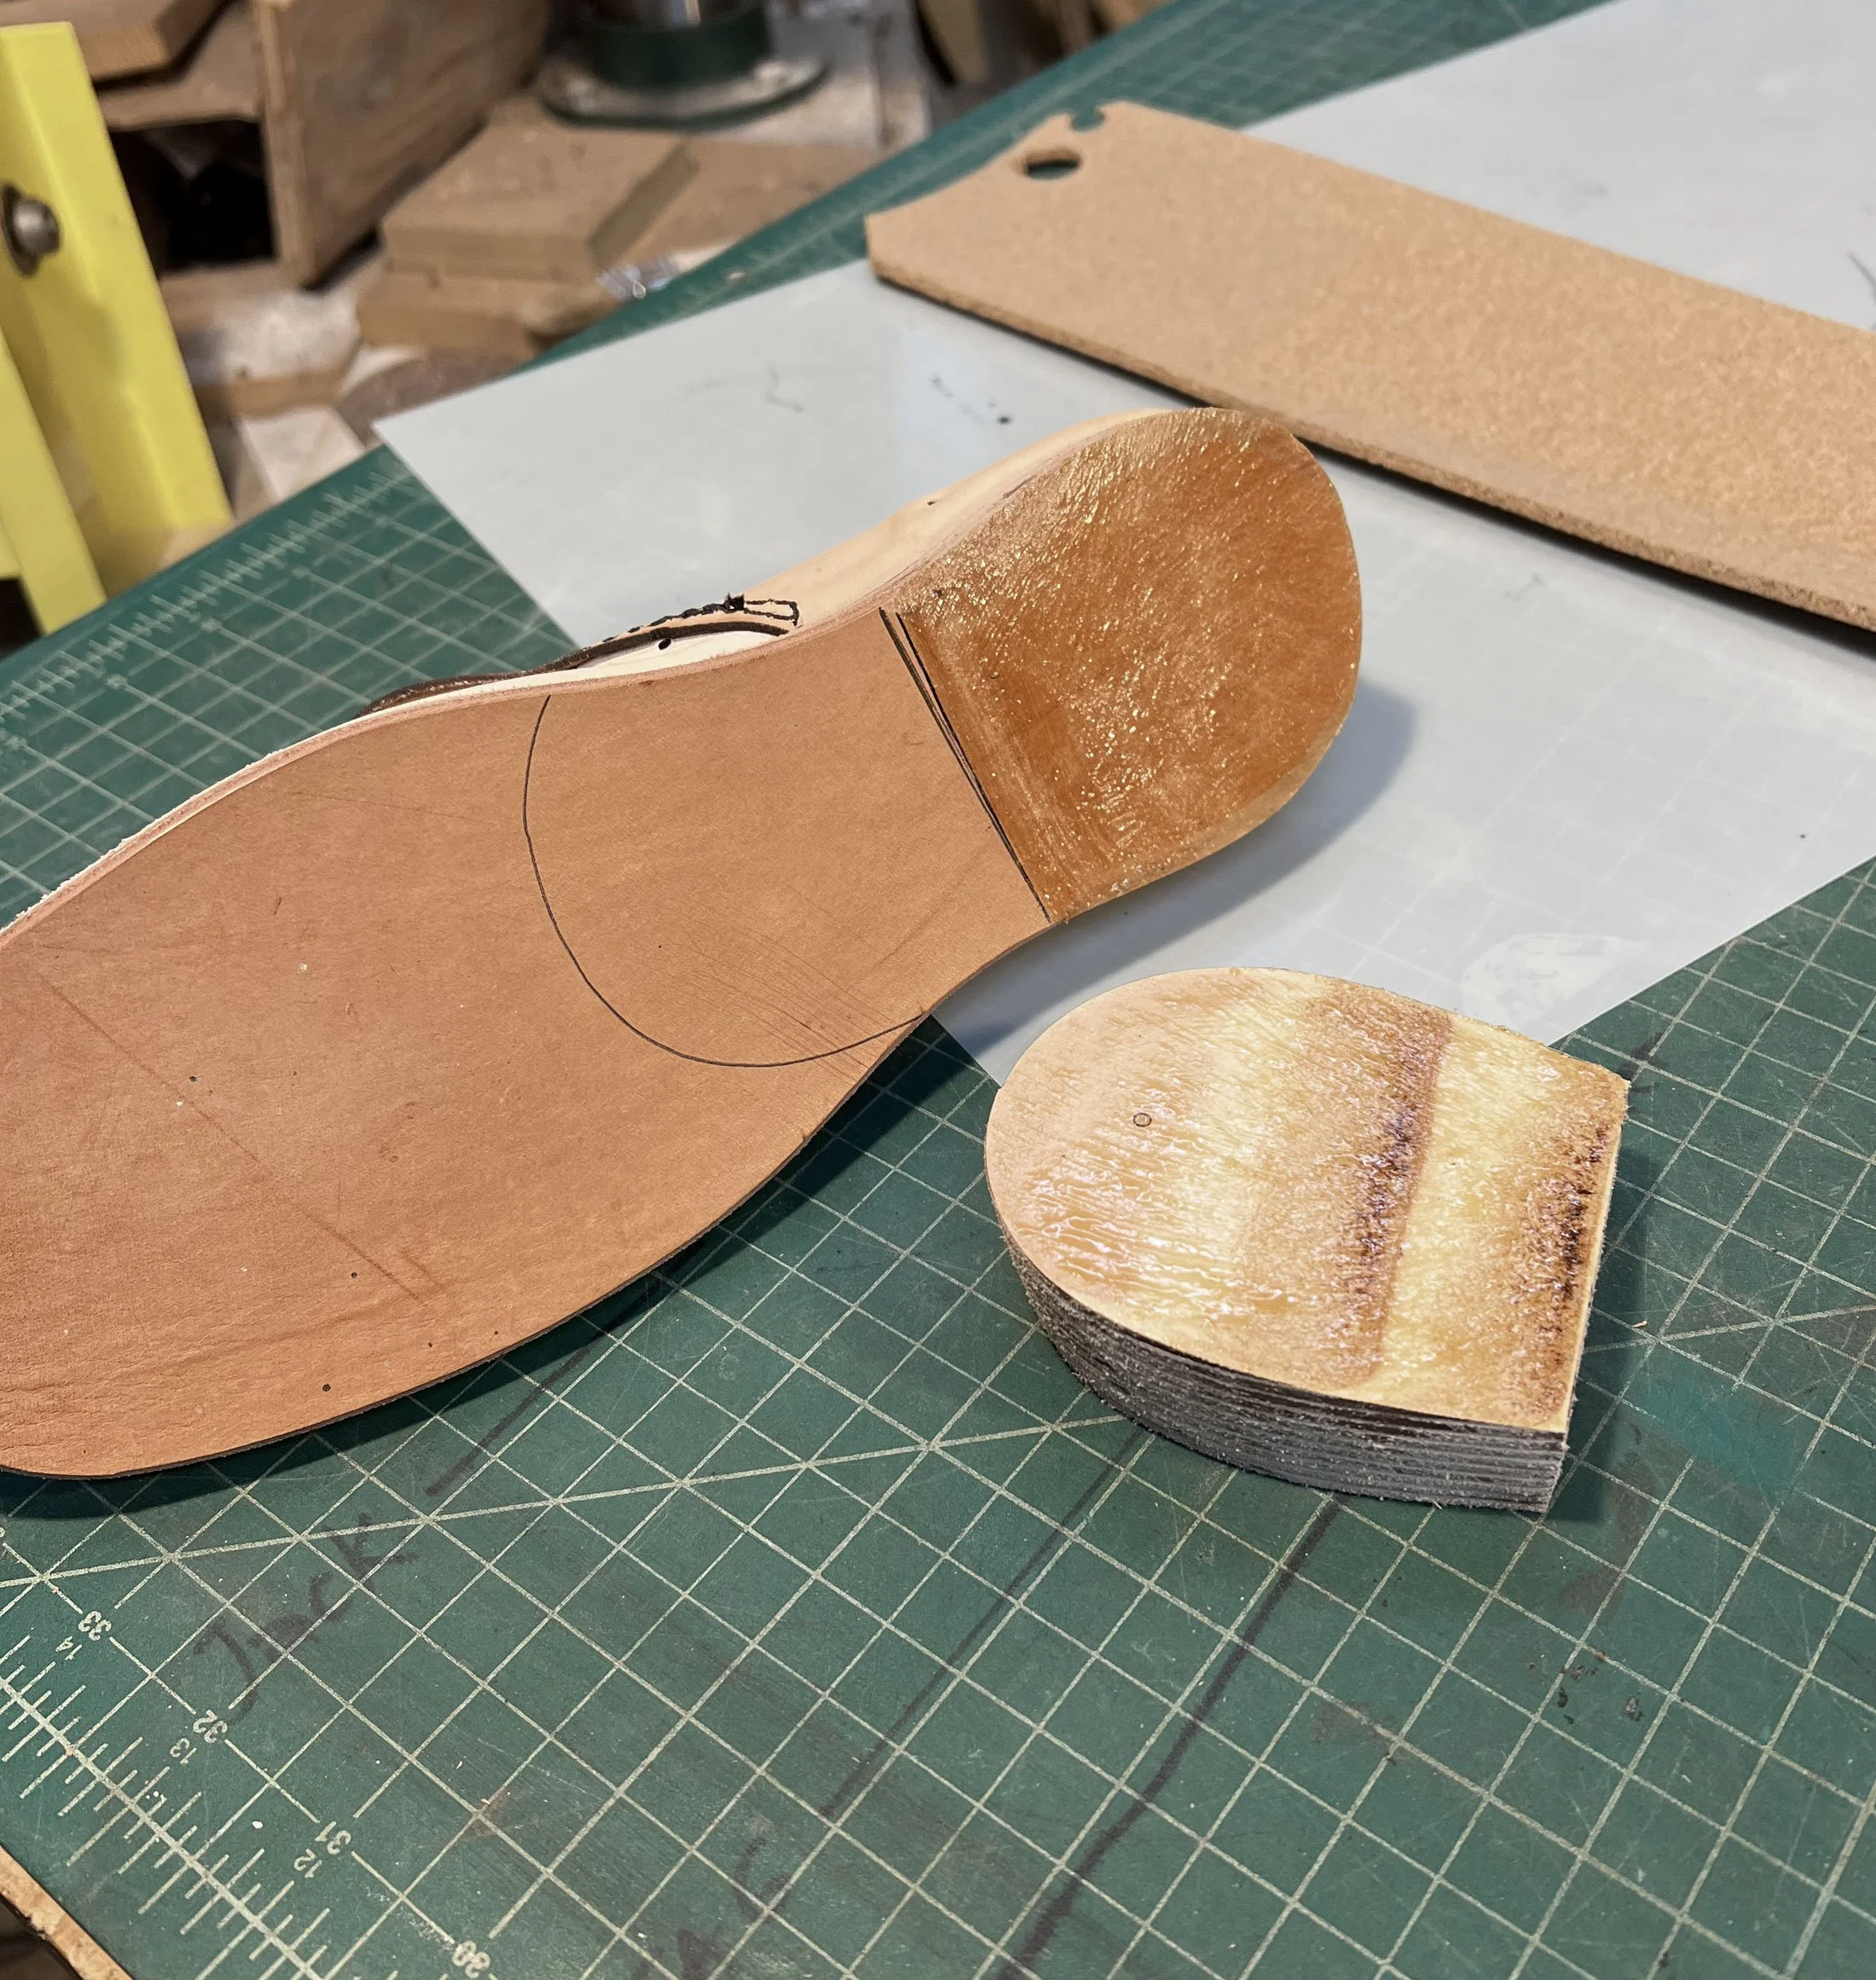
The sole was cemented to the midsole using contact cement designed for shoes. After hammering together to strengthen the bond, the excess sole material was bandsawn off, and the edges were sanded flush on a drum sander.

For the heel I used nine layers of 5-6 oz veg tan, cemented together with two wooden toothpicks aligning the layers and helping to hold them together. Historically wooden pegs were often used for this purpose in place of metal nails.
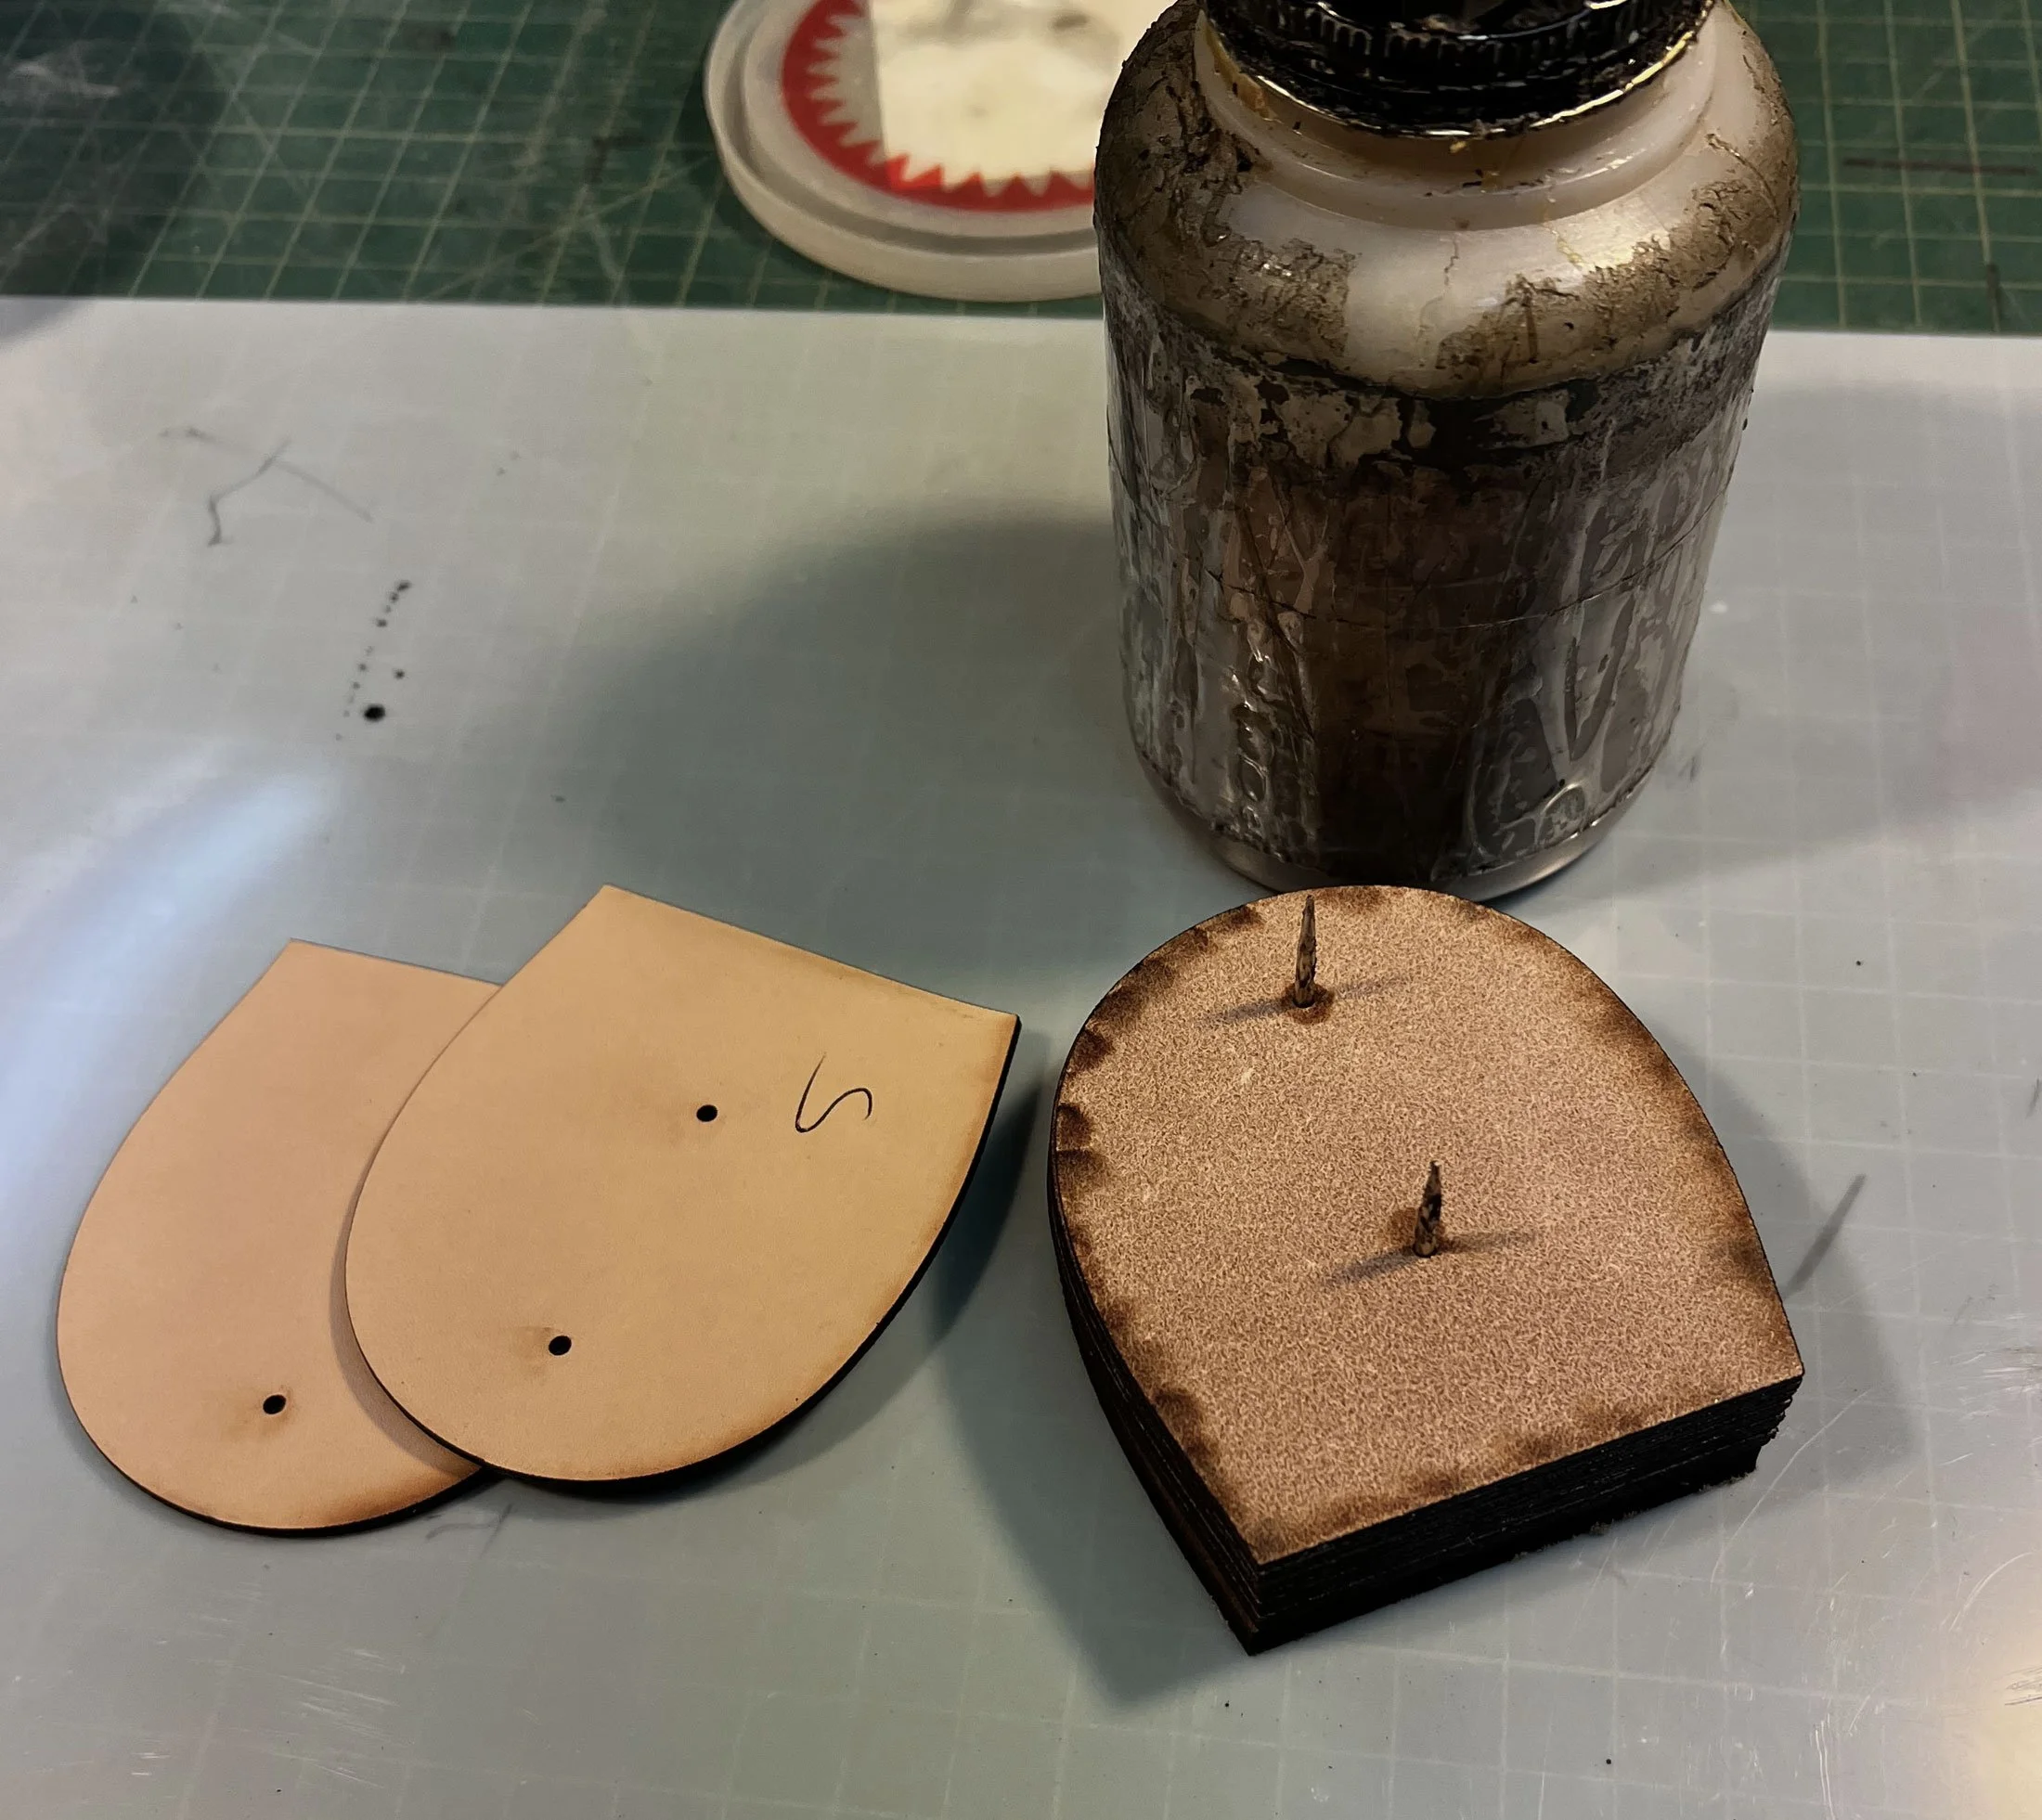
Gluing Up the Heel in Many Layers of Leather
Lastly I dyed and painted the shoe black, then installed a colonial style brass buckle which I got from Military Uniform Supply.
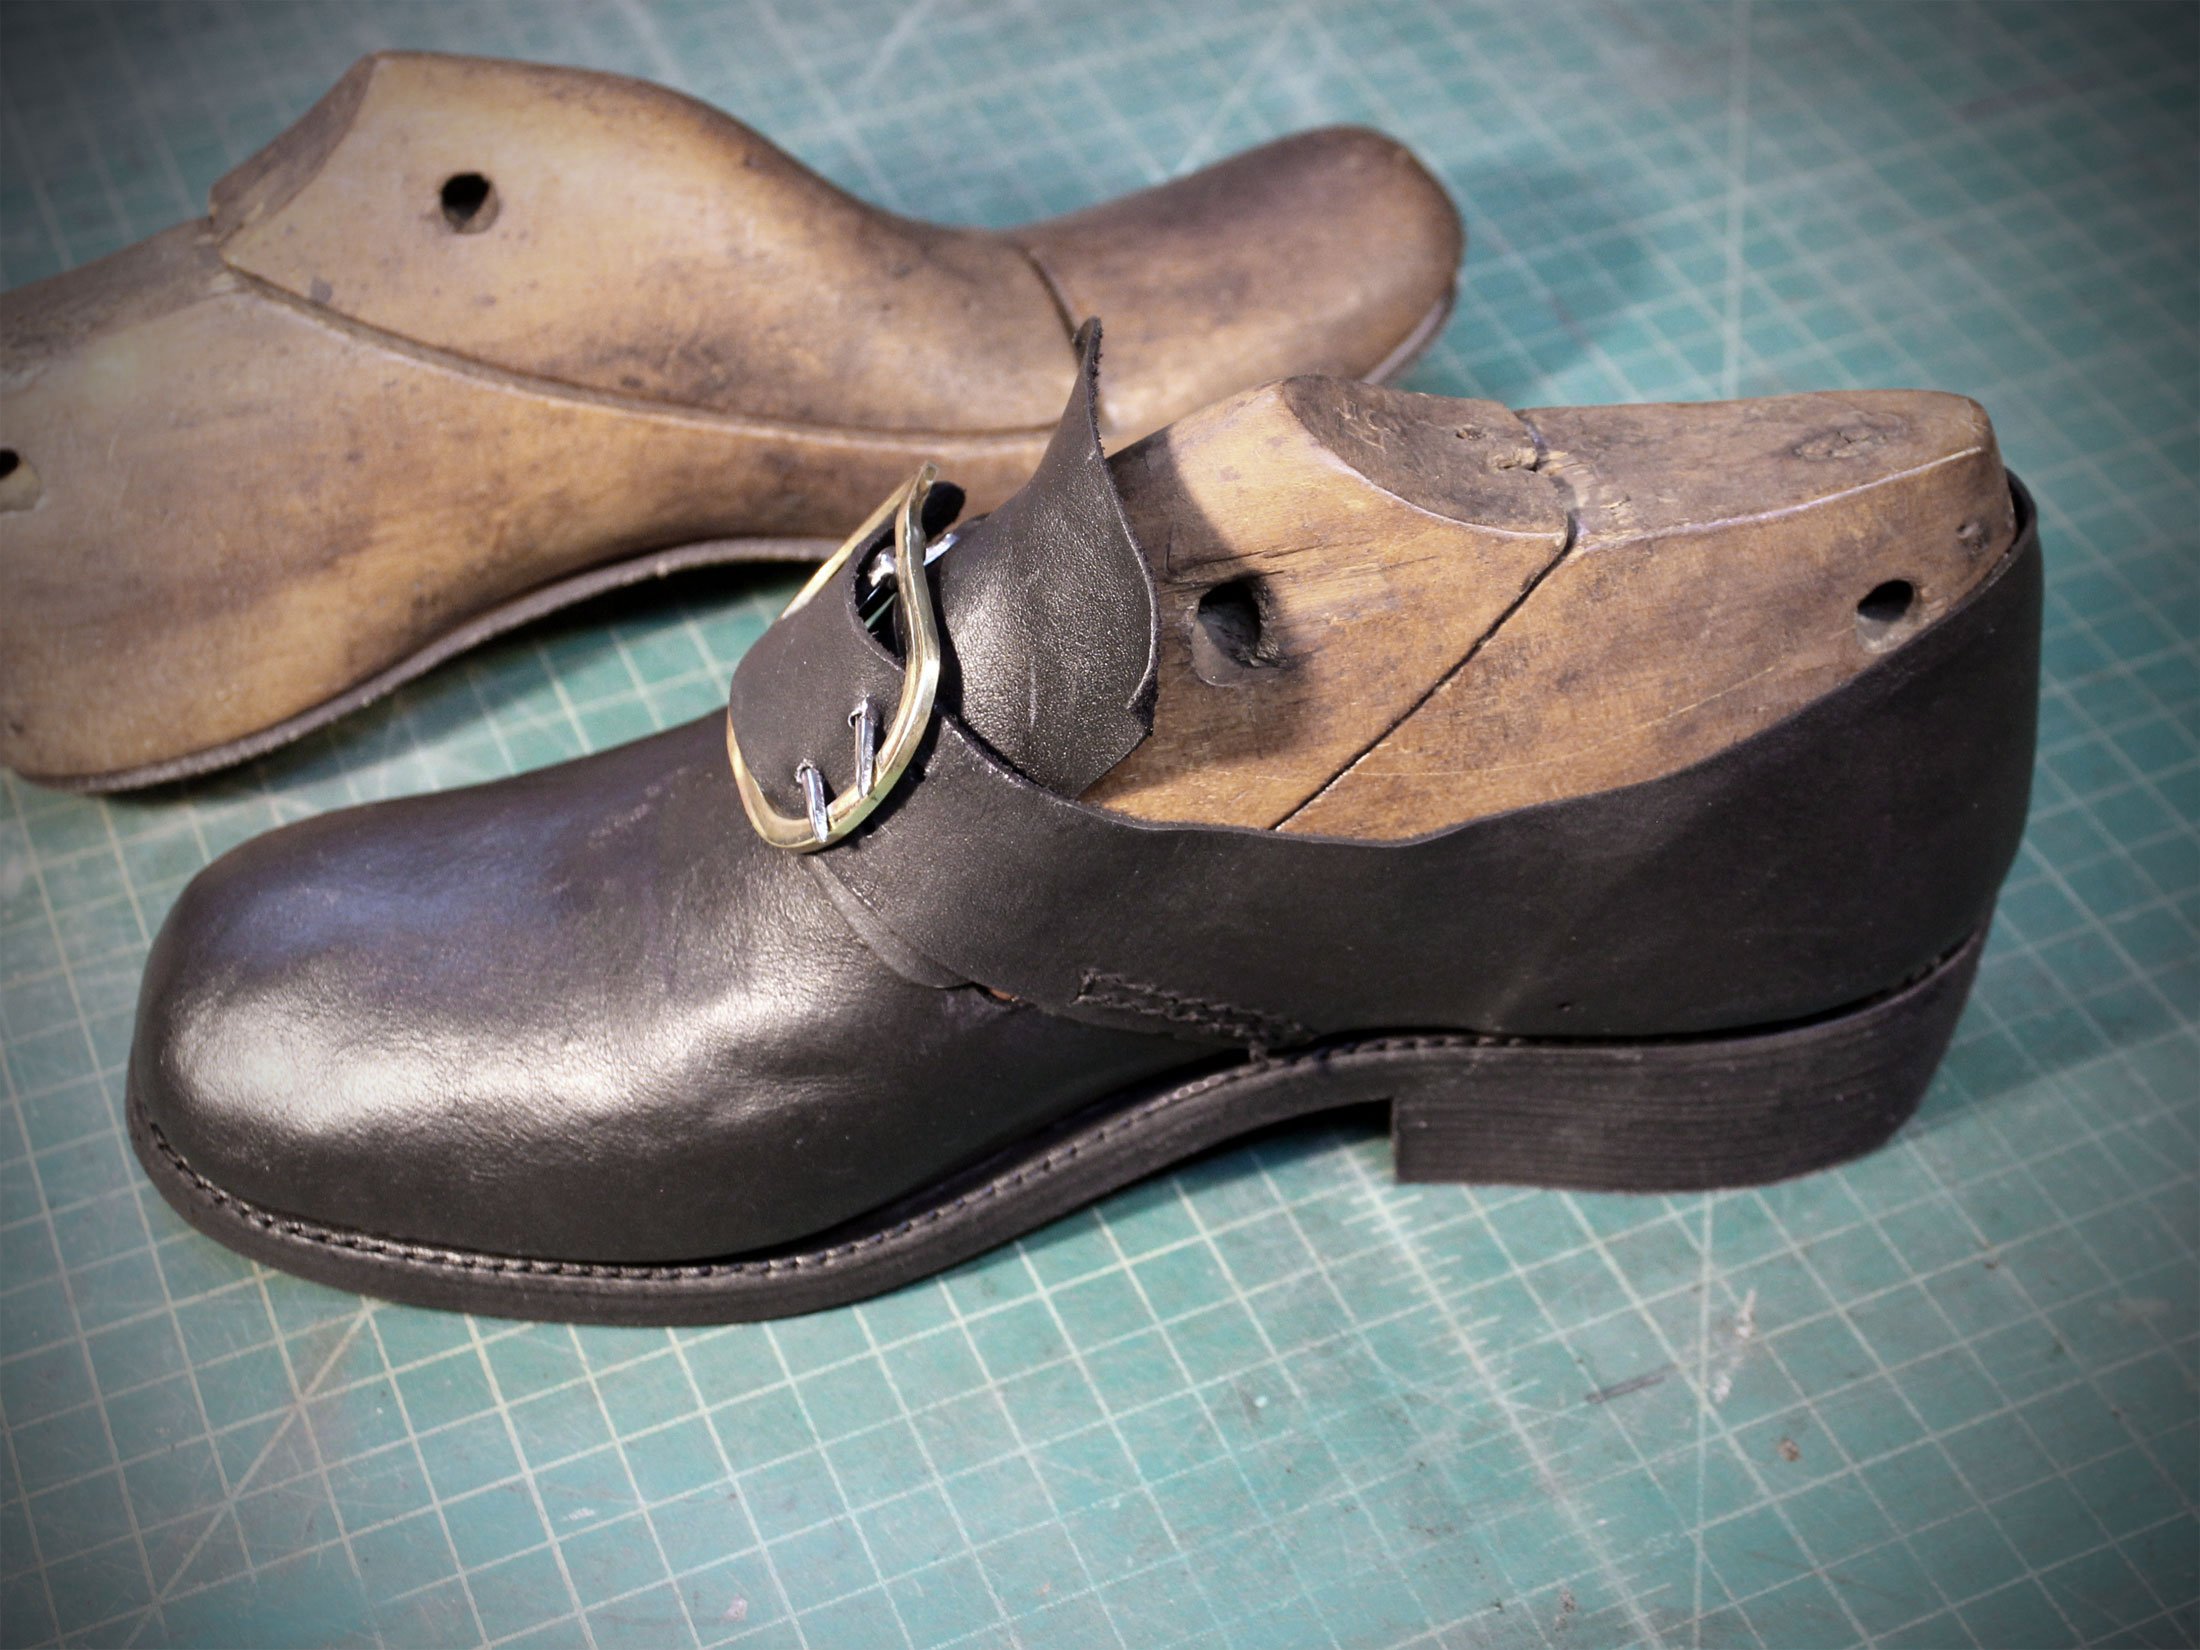
Given that I bought the lasts sight unseen from the Internet, I am quite pleased with the sizing. It is tight on me as I have a wide foot, but I am able to walk around in it comfortably enough.